Author: Julie Graham

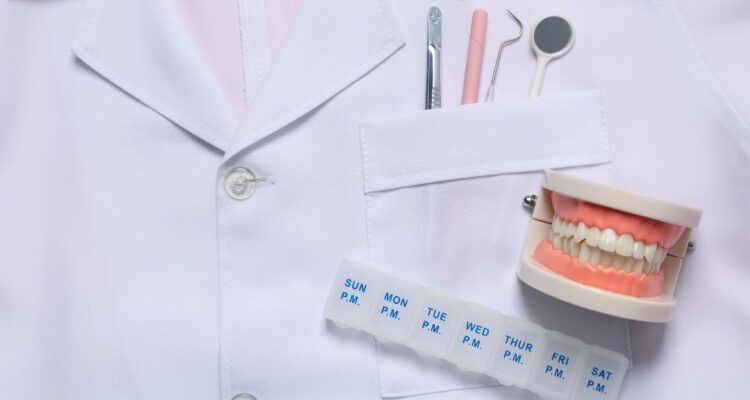
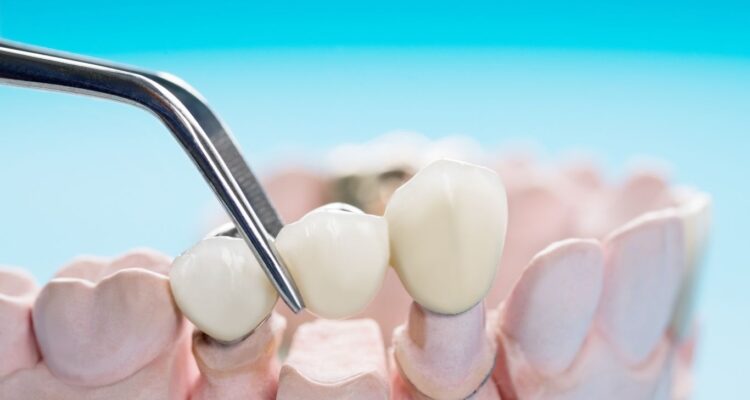
How to Remove Stains from Dental Bridges

Dental bridges are a popular choice for replacing missing teeth, helping restore both function and aesthetics to your smile. However, just like natural teeth, dental bridges are susceptible to stains. Over time, food, drinks, smoking, and even poor oral hygiene can cause discoloration. Knowing how to remove stains from dental bridges is essential for maintaining their appearance and ensuring they continue to look and function at their best.

In this article, we’ll explore effective methods to clean dental bridges, common mistakes to avoid, and tips to keep your smile shining bright.

What Causes Stains on Dental Bridges?

Before we dive into how to remove stains, it’s essential to understand why stains form on dental bridges in the first place. Just like your natural teeth, dental bridges can be discolored by various factors, including:

  1. Dietary Habits: Certain foods and drinks, such as coffee, tea, red wine, and curry, can cause staining. These substances contain tannins and pigments that cling to the surface of your dental bridges.

  2. Tobacco Use: Smoking or chewing tobacco can result in yellow or brown stains, which can be especially noticeable on the materials used for dental bridges.

  3. Poor Oral Hygiene: If plaque and tartar accumulate on the dental bridge, they can attract more stains and discoloration. Not brushing and flossing regularly can lead to the buildup of these substances.

  4. Age and Wear: Over time, the surface of your dental bridge may wear down slightly, making it more prone to staining. The natural wear and tear from chewing can also affect its appearance.

How Can I Effectively Remove Stains from Dental Bridges?

The good news is that there are several ways you can remove stains from your dental bridges and maintain their beauty. Here are some proven methods that work:

1. Brushing Your Dental Bridge Regularly

The first line of defense against staining is regular brushing. Just like natural teeth, dental bridges require cleaning twice a day. Use a non-abrasive toothbrush and fluoride toothpaste to gently brush your dental bridge and surrounding teeth. Make sure to brush in circular motions to avoid damaging the bridge.

  • Why this works: Brushing removes plaque and food particles that contribute to staining. It helps prevent the buildup of tartar, which can lead to more stubborn discoloration.

2. Use a Soft-Bristled Toothbrush

Using a soft-bristled toothbrush is essential when cleaning your dental bridge. Hard bristles can scratch the surface of the bridge, making it more prone to staining and damage. Look for a toothbrush that is specifically designed for dental work.

  • Why this works: A soft-bristled toothbrush is gentle on the bridge while still effectively removing plaque and debris. It also prevents scratches and grooves where stains can accumulate.

3. Try a Dental Bridge Cleaning Solution

For deeper cleaning, you can use a special dental bridge cleaner. These solutions are designed to clean both the surface and the inner parts of your bridge. They are gentle yet effective, helping to remove stains and odors caused by food, drink, and tobacco.

  • Why this works: Dental bridge cleaners are formulated to remove stubborn stains without damaging the bridge. They also help disinfect the bridge, ensuring it remains hygienic.

4. Use Baking Soda

Baking soda is a safe and effective way to remove surface stains from dental bridges. Create a paste by mixing baking soda with water and gently scrub the surface of the bridge using a soft toothbrush. Baking soda acts as a mild abrasive that lifts stains without damaging the bridge.

  • Why this works: Baking soda is mildly abrasive but won’t scratch the surface of the dental bridge. It helps to lift stains from the surface, leaving the bridge looking cleaner and brighter.

5. Hydrogen Peroxide Solution

Another effective method for cleaning dental bridges is hydrogen peroxide. You can use a diluted hydrogen peroxide solution (about 3% concentration) and gently apply it to the surface of the bridge. Use a soft toothbrush to scrub gently.

  • Why this works: Hydrogen peroxide is a natural disinfectant and bleaching agent that can help to remove stains and whiten the dental bridge. It also helps to kill bacteria and prevent oral infections.

How Can I Prevent Stains from Forming on My Dental Bridge?

Prevention is always better than cure, especially when it comes to stains on dental bridges. Here are some tips to help keep your dental bridge looking clean and free from stains:

1. Maintain Good Oral Hygiene

Brushing and flossing regularly are the best ways to prevent stains from forming on your dental bridge. Make sure to clean around the bridge carefully, as plaque can easily build up on the edges.

  • Why this works: Regular oral hygiene prevents plaque and bacteria buildup, which leads to staining. Flossing ensures that food particles are removed from between your bridge and natural teeth.

2. Avoid Staining Foods and Drinks

Try to limit your consumption of staining foods and drinks, such as coffee, tea, red wine, and berries. If you must indulge in them, consider rinsing your mouth with water afterward to minimize staining.

  • Why this works: Reducing your intake of staining substances will help prevent the buildup of pigment on your dental bridge.

3. Stop Smoking or Using Tobacco Products

Tobacco is one of the biggest culprits in staining dental work. If you want to keep your dental bridge looking clean and bright, consider quitting smoking or using tobacco products altogether.

  • Why this works: Quitting tobacco prevents the yellow and brown staining that occurs from the chemicals in tobacco. This will help your bridge maintain its natural color for longer.

4. Use a Mouthwash with Whitening Properties

Incorporating a mouthwash with whitening properties into your oral care routine can help reduce surface stains. Look for mouthwashes that are specifically designed to keep dental work clean.

  • Why this works: Whitening mouthwashes help to prevent staining and keep your dental bridge looking fresh. They can also help reduce plaque buildup and maintain oral hygiene.

What Are the Common Mistakes People Make When Cleaning Their Dental Bridges?

When it comes to cleaning dental bridges, there are a few common mistakes that can worsen the situation. Here are some of the most frequent errors and how to avoid them:

1. Using Abrasive Products

While baking soda is mild, some people make the mistake of using overly abrasive materials, like hard brushes or harsh cleaning products. This can scratch the surface of your dental bridge and make it more susceptible to staining.

  • How to avoid it: Always use soft-bristled brushes and non-abrasive cleaning products designed for dental work.

2. Not Flossing Around the Bridge

Flossing around your dental bridge is just as important as brushing it. Failing to floss can result in plaque and food buildup around the bridge, leading to discoloration and potential gum issues.

  • How to avoid it: Be sure to floss carefully around the edges of your bridge, using dental floss or special bridge floss designed for this purpose.

3. Skipping Regular Dental Checkups

Even with the best at-home care, it’s important to visit your dentist regularly for professional cleanings. Skipping checkups can lead to plaque buildup that can cause stains and damage your dental bridge.

  • How to avoid it: Schedule regular dental visits to ensure that your dental bridge remains clean and well-maintained.

How Long Do Dental Bridges Last, and How Can I Extend Their Lifespan?

Dental bridges are designed to be durable and can last anywhere from 5 to 15 years, depending on the materials used and how well you care for them. To extend the lifespan of your dental bridge and keep it free from stains:

  1. Follow the cleaning methods outlined above.

  2. Avoid using your dental bridge to chew hard foods, which can cause wear.

  3. Get regular dental checkups and professional cleanings.

By maintaining proper care and attention, you can keep your dental bridge looking like new for years to come.

Conclusion

Knowing how to remove stains from dental bridges is essential for keeping them in excellent condition. Regular cleaning, proper oral hygiene, and taking preventative measures will help ensure your bridge remains stain-free and maintains its natural appearance. By following these tips, you can enjoy a bright, healthy smile for years to come.

Understanding the Dentures Dental Code: Your Ultimate Guide

When it comes to dental care, understanding the different types of procedures and their corresponding codes is essential. This is especially true for dentures, a common solution for those needing restorative dental work. Dentures not only help restore functionality but also improve the aesthetic appeal of a smile. If you’re considering dentures or are just looking to understand how they’re classified within the dental system, it’s important to know about the dentures dental code.

In this comprehensive guide, we’ll break down what the dentures dental code is, how it’s used, and why it’s significant for both patients and dental professionals. Let’s dive into this crucial aspect of dental care!

What Is the Dentures Dental Code?

The dentures dental code refers to a specific set of codes used by dental professionals to categorize and describe the different types of dentures provided to patients. These codes are essential for billing purposes, ensuring that insurance claims are processed correctly, and for documenting the dental treatment provided.

The codes fall under the Current Dental Terminology (CDT), a set of codes developed by the American Dental Association (ADA) to standardize dental procedures across the country. Each code is associated with a specific procedure or treatment, and in the case of dentures, these codes are used to specify whether the dentures are complete, partial, or made of different materials.

Understanding the dentures dental code helps dental providers and patients alike ensure that all treatments are accurately recorded and reimbursed. This clarity also ensures that you, as a patient, are aware of your dental care options and the costs associated with each one.

Why Do Dentists Use the Dentures Dental Code?

Dentists use the dentures dental code primarily for two main reasons: insurance reimbursement and accurate record-keeping. Here’s a breakdown:

  1. Insurance Reimbursement: Insurance companies require specific codes to process claims for dental procedures. The dentures dental code allows dental professionals to specify the exact type of dentures being used, ensuring that insurance claims are submitted correctly and quickly. Without these codes, there could be confusion, leading to delays or denials of coverage.

  2. Accurate Record-Keeping: The dentures dental code also serves as a reference for future visits. If a patient needs adjustments or repairs, the code will help the dentist understand the exact type of dentures the patient has, ensuring proper treatment.

What Types of Dentures Are Covered by the Dentures Dental Code?

The dentures dental code covers several different types of dentures, each with its specific classification. The two main categories are complete dentures and partial dentures.

  • Complete Dentures: These are used when all the teeth in a dental arch are missing. Complete dentures are designed to replace an entire set of teeth, and they are typically made from acrylic, porcelain, or a combination of materials. The code for complete dentures varies depending on the materials used and whether the dentures are fabricated for the upper or lower arch.

  • Partial Dentures: Partial dentures are used when some natural teeth remain. These dentures are designed to fill in the gaps left by missing teeth. Partial dentures are often supported by the remaining natural teeth, and they can be made from a variety of materials, including metal and acrylic. The code for partial dentures will depend on the materials used and the number of teeth being replaced.

  • Implant-Supported Dentures: These are dentures that are anchored in place by dental implants. They provide a more secure and stable fit compared to traditional dentures. The dentures dental code for implant-supported dentures will specify the type of implants and the procedure used to place them.

  • Temporary Dentures: Sometimes, a dentist may provide a temporary set of dentures while waiting for the permanent set to be made. Temporary dentures help patients maintain normal function and appearance during the transition period.

Each type of denture has its own specific code, ensuring that the treatment is accurately documented.

How Does the Dentures Dental Code Impact Your Treatment Plan?

The dentures dental code plays an essential role in shaping your treatment plan. Here’s how it works:

  1. Treatment Customization: By using the right codes, your dentist can tailor your treatment to your specific needs. Whether you need complete dentures or partial dentures, the dentist can select the appropriate materials and design that will work best for your oral health.

  2. Clear Communication: The dentures dental code allows for clear communication between dental professionals, laboratories, and insurance companies. This ensures that everyone is on the same page when it comes to the treatment being provided.

  3. Cost Estimates: Understanding the dentures dental code can also help you better understand the cost of your treatment. Different types of dentures and materials may have different prices, so knowing the code can provide insight into the expected costs of your dentures.

  4. Insurance Approval: Since insurance companies rely on the dentures dental code to process claims, using the correct code can streamline the approval process. This helps ensure that you receive the full coverage for your dentures and any associated treatments.

What Are the Common Denture Codes You Should Know?

Here’s a quick overview of some common dentures dental codes:

  • D5110: Complete denture – upper arch

  • D5120: Complete denture – lower arch

  • D5211: Upper partial denture, resin base, includes clasp

  • D5212: Lower partial denture, resin base, includes clasp

  • D7240: Removal of impacted tooth, part of denture treatment

  • D8691: Replacement of missing tooth in a partial denture

These codes may vary depending on the specific procedure, the materials used, and the type of denture being provided.

How Can You Ensure Accurate Use of the Dentures Dental Code?

To ensure that your dentures are properly coded and your treatment is fully covered, there are a few steps you should take:

  1. Discuss Your Options with Your Dentist: Before agreeing to any treatment, make sure you fully understand the options available to you. Ask your dentist about the materials used in your dentures, the type of dentures that are best for your needs, and how the treatment will be coded.

  2. Confirm with Your Insurance: Reach out to your insurance company to ensure they cover the type of dentures you need. Ask them how the dentures dental code is used for reimbursement and what your financial responsibility will be.

  3. Review Your Treatment Plan: When your dentist provides you with a treatment plan, check the codes listed to ensure they accurately reflect the dentures you will be receiving. If anything seems unclear, don’t hesitate to ask for clarification.

  4. Keep Track of Your Claims: After receiving your dentures, review any insurance claims to ensure the correct codes were used. If there are any discrepancies, contact your insurance company or dentist to resolve the issue.

Final Thoughts

Understanding the dentures dental code is essential for anyone considering dentures. It not only ensures that you receive the correct treatment but also helps with insurance claims, cost transparency, and long-term care. Whether you need complete dentures, partial dentures, or implant-supported dentures, knowing the code used for your specific treatment can make the entire process smoother and more straightforward.

By staying informed about the dentures dental code, you can make more confident decisions about your dental care, ensuring that your smile remains functional and beautiful for years to come.

Who Is Best Qualified to Do Dental Implants?

Dental implants have become a go-to solution for restoring missing teeth, offering a permanent and natural-looking alternative to dentures. However, the success of this procedure heavily depends on the qualifications and expertise of the professional performing it. So, who is best qualified to do dental implants? In this guide, we will explore everything you need to know to ensure you choose the right dental professional for this complex procedure.

Who Can Perform Dental Implants?

When you’re considering dental implants, it’s essential to understand the different professionals who may perform the procedure. In general, dental implants can be carried out by several specialists, including general dentists, periodontists, and oral surgeons. However, each of these professionals brings a unique set of skills to the table.

General Dentists

Some general dentists are qualified to perform dental implant procedures after completing additional training. These professionals may have attended a specialized course or program to gain expertise in implantology. However, it’s important to note that not all general dentists have the same level of experience with implants.

While a general dentist may be able to handle straightforward cases, they may refer patients to a specialist if the case involves significant complications or requires advanced techniques.

Periodontists

Periodontists are specialists in gum health and the structures surrounding teeth. They focus on the diagnosis, prevention, and treatment of periodontal disease and are often well-versed in dental implants. If you have gum issues or bone loss, a periodontist may be the best option for your dental implant needs.

Periodontists are specially trained to handle the intricate aspects of dental implant procedures, especially in cases where bone grafts or other advanced treatments are necessary.

Oral Surgeons

Oral and maxillofacial surgeons are highly trained professionals who perform surgeries on the mouth, jaw, and face. They have extensive experience in complex procedures, including dental implants. For patients with complicated cases such as severe bone loss, jaw misalignment, or medical conditions that complicate healing, an oral surgeon is typically the best-qualified professional to perform the implant procedure.

Oral surgeons are the experts when it comes to handling surgeries that involve the jawbone and surrounding structures, ensuring both safety and the best possible outcome.

Prosthodontists

Although prosthodontists focus primarily on restoring and replacing teeth, some are also skilled in dental implant procedures. They specialize in designing and placing dental restorations such as crowns, bridges, and dentures. While they may not perform the surgery itself, prosthodontists play an important role in the overall process by ensuring the implant is properly restored to function and appearance.

What Qualifications Should a Dental Implant Specialist Have?

When choosing a professional for your dental implants, it’s essential to verify their qualifications to ensure that you are in safe hands. Here are the key qualifications that the best implant specialists should possess:

Specialized Education and Training

Dental implantology is a highly specialized field. Professionals who perform dental implants should have undergone advanced education beyond their basic dental degree. This could include postgraduate training, fellowships, or certifications in implantology. Look for specialists who have received specific training in this area, as this shows that they are committed to staying updated with the latest techniques and technologies.

Experience with Dental Implants

Experience is one of the most critical factors when selecting an implant specialist. The more experience a professional has with dental implants, the higher the likelihood of success for your procedure. You should inquire about how many dental implant surgeries the specialist has performed, particularly in cases similar to yours.

Board Certification

While not all states require board certification for dental implant specialists, it’s a good idea to look for professionals who have been certified by recognized dental boards such as the American Board of Oral and Maxillofacial Surgery (ABOMS) or the American Academy of Periodontology (AAP). These certifications indicate that the specialist has met high standards of education, training, and practice.

Continuing Education

The dental field is constantly evolving, with new techniques, tools, and research emerging regularly. A qualified implant specialist should be committed to continuing education and staying current with the latest advancements in implant dentistry. Check if the professional attends dental implant conferences or participates in ongoing training.

What Are the Risks of Choosing an Unqualified Implant Specialist?

Choosing the wrong professional for your dental implants can lead to significant risks. While dental implant surgery is generally safe, complications can arise if the procedure is not performed by a skilled and qualified specialist.

Failed Implants

One of the most common risks of choosing an unqualified professional is the failure of the implant. If the implant is not placed correctly, it may not fuse properly with the jawbone, leading to implant failure. This may result in pain, discomfort, and additional expenses for corrective procedures.

Infections

Infections can occur if proper sterilization procedures are not followed or if the surgical site is not cared for appropriately during the healing process. An unqualified implant specialist may lack the skills to prevent or manage infections, which can lead to serious complications and prolonged recovery times.

Nerve Damage

Improper placement of dental implants can result in nerve damage. This could lead to numbness or tingling in the face, gums, or lips, which may be temporary or, in rare cases, permanent. An experienced specialist will have the knowledge and skill to avoid damaging sensitive nerves during the procedure.

Prolonged Recovery

An unqualified professional may not be able to effectively manage the recovery process, leading to prolonged healing times, discomfort, and complications. A qualified implant specialist will ensure that you follow the correct post-operative care instructions, which is crucial for successful recovery.

How Do You Choose the Right Implant Specialist?

Choosing the right specialist for your dental implants requires careful consideration. Here are a few tips to help you find the best-qualified professional for your needs:

Research the Specialist’s Background

Start by researching the professional’s qualifications, experience, and reputation. Look for patient reviews, testimonials, and before-and-after photos of previous cases. A specialist who has a proven track record of successful implant procedures is more likely to deliver the results you want.

Ask About the Consultation Process

A good implant specialist will provide a thorough consultation where they discuss your medical history, examine your mouth, and explain the different options available to you. They should take the time to answer all your questions and address any concerns.

Check for Professional Affiliations

Check if the implant specialist is a member of reputable professional organizations such as the American Academy of Implant Dentistry (AAID) or the International Congress of Oral Implantologists (ICOI). These organizations have strict membership standards and ensure that their members are committed to high standards of care.

Evaluate the Technology Used

Dental implants require precise planning and execution. Ask the specialist about the technology and tools they use for planning and placing the implants. Modern imaging technologies, such as 3D scans, can help ensure that the implants are placed accurately and efficiently.

Conclusion

When it comes to dental implants, the expertise and qualifications of the professional performing the procedure are crucial to achieving a successful outcome. General dentists, periodontists, oral surgeons, and prosthodontists all play important roles in implant procedures, but not every practitioner has the same level of skill and experience. By ensuring that the professional you choose has the right qualifications, experience, and commitment to continuing education, you can improve your chances of achieving the best possible result.

Remember, dental implants are a long-term investment in your health and smile, so it’s important to choose someone who is best qualified to do the job right.

Understanding the D0350 Dental Code: Everything You Need to Know

In the field of dentistry, one of the most essential elements is the effective communication between dental professionals, insurance companies, and patients. This communication often takes place through codes that help identify specific procedures. These codes are part of a system known as the Current Dental Terminology (CDT), developed by the American Dental Association (ADA). One such code that plays a critical role in dental practices, especially in diagnostic imaging, is the D0350 dental code.

The D0350 dental code specifically relates to the use of intraoral photographs. Intraoral photography plays a significant role in diagnosing, documenting, and planning dental treatments. Whether you are a dentist, dental office manager, or patient, understanding the D0350 code is crucial for proper billing, treatment planning, and communication.

This guide aims to provide a comprehensive understanding of the D0350 dental code. From its purpose and importance to how it’s used and common misconceptions, we will cover everything you need to know about this essential component of modern dental care.

What is the D0350 Dental Code?

The D0350 dental code is part of the Current Dental Terminology (CDT) system used by dental professionals to categorize procedures and treatments. It is specifically used for intraoral photography, a diagnostic tool that allows dentists to capture detailed images of the inside of a patient’s mouth. These photographs can include images of the teeth, gums, and other oral structures.

Intraoral photography is vital for documentation, diagnosis, and monitoring treatment progress. It helps dentists make more accurate diagnoses, track changes in a patient’s oral health, and plan treatments more effectively. The D0350 code ensures that this crucial procedure is properly recorded and reimbursed by insurance companies.

The Purpose of Intraoral Photography

Intraoral photography has become an invaluable tool for dentists for several reasons. It allows dental professionals to take high-quality photographs of a patient’s mouth using specialized cameras that are small enough to be inserted into the mouth. The images can capture minute details that are often missed with the naked eye, making it easier to detect oral health issues early on.

Here are some key purposes of intraoral photography:

Improved Diagnosis:

Dentists can use intraoral images to observe problems like cavities, cracks, gum disease, or other oral health issues. These images often provide more information than a verbal description or traditional diagnostic methods like X-rays.

Treatment Planning:

Intraoral photos can be used to create treatment plans, especially for complex cases like orthodontics or cosmetic dentistry. The visual data helps both the patient and the dentist understand what needs to be done.

Monitoring Progress:

For ongoing treatments, such as braces or gum treatments, intraoral photographs provide a visual record of how a patient’s condition is changing over time. These photos can help track progress and ensure the treatment is on the right path.

Patient Education:

Showing patients the actual images of their mouths can be a very effective way to educate them about their oral health. Visual aids often help patients understand complex issues better than just verbal descriptions.

Legal and Insurance Documentation:

In some cases, intraoral photographs may be needed for legal purposes, such as documenting the results of a procedure or providing evidence for insurance claims.

Why the D0350 Code Matters

The D0350 code is crucial in ensuring that intraoral photography is used correctly and appropriately within the dental industry. Here’s why this dental code matters:

Standardization for Billing and Insurance:

The D0350 code standardizes the billing process for intraoral photography. This means that insurance companies and dental practices can rely on the CDT system to ensure proper reimbursement for services provided.

Clear Communication Between Professionals:

When a dentist submits a claim using the D0350 code, it serves as a clear and precise reference for the services rendered. The use of this code helps specialists, referring dentists, and insurance companies understand the procedures performed without any confusion.

Accuracy in Patient Care:

By assigning a specific code to intraoral photography, it ensures that this essential service is not overlooked. This leads to more accurate treatment planning, better patient care, and more thorough documentation.

Legal and Regulatory Compliance:

Using the correct dental codes, including the D0350 code, helps dental practices maintain compliance with industry standards and regulations. It also ensures that practices avoid legal issues related to incorrect or incomplete documentation.

Efficient Record Keeping:

The D0350 code makes it easier to store and retrieve records for specific dental services. This is helpful for dentists when they need to reference past treatments or track a patient’s oral health over time.

How the D0350 Code is Used

The D0350 dental code is used to bill for intraoral photographs taken for diagnostic purposes. These photographs are typically taken using specialized cameras designed to capture high-quality images inside the patient’s mouth. The D0350 code ensures that the service is properly recorded, billed, and reimbursed.

Here are some of the most common situations where the D0350 code might be applied:

1. Initial Examination and Diagnosis

When a patient visits the dentist for the first time, intraoral photographs are often taken as part of the initial examination. This allows the dentist to document the current state of the patient’s oral health and provide an accurate diagnosis. These photographs can be used for comparison in future visits.

2. Orthodontic and Cosmetic Dentistry

In orthodontics and cosmetic dentistry, intraoral photographs are crucial for planning and tracking treatment. For example, if a patient is receiving braces or undergoing a smile makeover, photographs can show before and after images, helping to demonstrate the effectiveness of the treatment.

3. Monitoring the Progress of Treatments

Intraoral photographs are often used to monitor the progress of ongoing treatments. For example, if a patient is undergoing gum therapy or an implant procedure, these photos can help the dentist track improvements or identify any complications.

4. Post-Treatment Documentation

Once a treatment is completed, it’s essential to document the results. For example, after a root canal or cosmetic procedure, intraoral photographs provide a clear visual record of the outcome, which can be useful for the patient’s ongoing care or for any potential legal purposes.

5. Referral to Specialists

If a dentist refers a patient to a specialist, the D0350 code and accompanying photographs may be used to communicate important details about the patient’s oral condition. For example, if a patient needs to see an oral surgeon, the photographs help provide the specialist with a better understanding of the situation.

The Benefits of Intraoral Photography

Intraoral photography offers numerous benefits to both dental professionals and patients. Here are some of the top advantages:

1. Enhanced Diagnostic Accuracy

Intraoral photographs provide high-definition images of a patient’s oral structures, making it easier to identify issues that might be overlooked during a traditional examination. This leads to more accurate diagnoses and a better understanding of the patient’s condition.

2. Better Patient Education

Visual aids are powerful tools for educating patients about their oral health. By showing patients photographs of their mouths, dentists can help them better understand the need for certain treatments and how they will improve their health.

3. Improved Communication

Intraoral photos make communication between dental professionals easier. When referring patients to other specialists or discussing treatment plans, photographs provide a clear visual reference, eliminating any confusion that might arise from verbal descriptions alone.

4. Documenting Treatment Results

For treatments like cosmetic dentistry, intraoral photography is invaluable for documenting the results. These photos can be used to compare before-and-after images, showing the patient the progress made and the success of the procedure.

5. Insurance and Legal Protection

Intraoral photographs can also serve as documentation for insurance claims or legal purposes. If there is a dispute or claim related to treatment, these photos provide visual proof of what was done and why it was necessary.

Common Misconceptions About the D0350 Code

There are several misconceptions about the D0350 code that need to be addressed:

1. It’s Only for Cosmetic Procedures

While intraoral photography is commonly used in cosmetic dentistry, it is not limited to cosmetic treatments. The D0350 code is applicable to any diagnostic procedure where intraoral photographs are necessary, including general dentistry and orthodontics.

2. It’s Not Essential for Every Patient

Some patients may not need intraoral photographs, especially if they are receiving routine care. However, for patients undergoing more complex procedures or treatments, intraoral photography is often a crucial tool for accurate diagnosis and treatment planning.

3. It’s Just for Record-Keeping

While intraoral photography does serve as an important record-keeping tool, its value extends beyond documentation. These images are essential for diagnosis, treatment planning, and monitoring the effectiveness of treatments.

How to Ensure Proper Use of the D0350 Code

For dental professionals, it is essential to ensure that the D0350 code is used correctly. Here are a few tips for ensuring that intraoral photographs are properly billed and documented:

1. Ensure Proper Documentation

Always ensure that the photographs taken are relevant to the treatment being provided. The D0350 code should be used only for diagnostic purposes, not for aesthetic or promotional purposes.

2. Submit Complete Claims

When submitting insurance claims for intraoral photography, make sure that the necessary documentation, including the photographs, is included. This ensures that insurance companies can properly assess and reimburse the procedure.

3. Use High-Quality Equipment

Using high-quality cameras is crucial for taking clear, detailed photographs. Poor-quality images may not provide sufficient diagnostic value and may lead to claim denials.

4. Stay Updated on Insurance Policies

Insurance companies may have specific requirements for the use of the D0350 code. It’s important to stay informed about these policies to avoid claim issues.

Conclusion

The D0350 dental code plays a significant role in ensuring that intraoral photographs are accurately documented, billed, and reimbursed. Understanding this code and its application is essential for both dental professionals and patients. Whether you are seeking dental treatment or managing a dental practice, the D0350 code helps streamline the diagnostic process, improve patient care, and ensure that treatments are properly compensated.

Incorporating intraoral photography into your dental practice can enhance the accuracy of diagnoses, improve communication with patients and specialists, and provide valuable visual documentation for insurance and legal purposes. By understanding the importance and proper use of the D0350 code, dental professionals can improve the overall quality of care they provide and ensure that patients receive the best possible outcomes.

Can I Smoke 7 Days After Wisdom Teeth Removal

If you’ve recently had wisdom teeth removed, you’re likely dealing with some level of discomfort, swelling, and following your dentist’s recovery instructions carefully. For many, however, there’s one lingering question: Can I smoke 7 days after wisdom teeth removal? While smoking is a common habit for many people, it’s crucial to understand how it can interfere with your healing process after undergoing dental surgery. Smoking introduces various risks that can delay healing, cause unnecessary pain, and lead to serious complications like dry socket. This article will explore why smoking after wisdom teeth removal can be detrimental, the optimal recovery period before smoking, and the safest strategies for managing cravings during your recovery period.

Can Smoking After Wisdom Teeth Removal Delay Healing?

Smoking after wisdom teeth removal is a significant factor that can disrupt the healing process and lead to a variety of complications. It’s not just about the immediate discomfort—it’s the long-term effects that can harm your recovery. Below, we will discuss the risks associated with smoking too soon after your surgery.

Why Smoking is a Risk After Dental Surgery

One of the primary reasons smoking is discouraged after wisdom teeth removal is due to the suction that occurs when you inhale smoke. This suction creates pressure in your mouth, which can cause the blood clot in the socket to dislodge. The blood clot plays a crucial role in protecting the exposed bone and nerves while the healing process occurs. If the clot is dislodged prematurely, it can lead to a condition called dry socket.

The Impact of Nicotine on Healing

Nicotine, the addictive substance found in cigarettes, constricts blood vessels and decreases blood flow to the affected area. This reduced circulation slows down the delivery of oxygen and nutrients that are essential for the healing of your gums and tissues. As a result, the healing process takes longer, and you may experience more discomfort. Furthermore, the restricted blood flow can also leave your gums and other tissues more vulnerable to infection.

The Dangers of Smoking Too Soon After Wisdom Teeth Removal

Smoking is one of the leading causes of complications after wisdom teeth removal. Below, we will dive deeper into the risks associated with smoking too soon after your surgery.

What Happens to the Healing Process if You Smoke Too Soon?

Smoking too soon after wisdom teeth removal doesn’t just delay healing—it can create an environment where bacteria can thrive. The opening left by the wisdom tooth is vulnerable to infection, and smoking can introduce harmful chemicals and bacteria into the mouth. If the blood clot is disturbed and bacteria enter the open socket, an infection can develop, causing increased pain and prolonging the recovery time.

Additionally, the suction from smoking can significantly hinder the clotting process, leading to a dry socket, which is both painful and difficult to treat. Dry socket occurs when the clot that was supposed to form in the empty socket is lost or dislodged, exposing bone and nerves. This can cause severe pain, which typically requires additional visits to the dentist for treatment.

The Role of Dry Socket in Your Recovery

Dry socket is one of the most common complications associated with smoking after wisdom teeth extraction. It is characterized by sharp pain that usually develops a few days after the procedure, once the blood clot has dislodged. This condition is not only painful but also lengthens your recovery time. In some cases, additional treatments or medications are required to help the healing process. The exposure of bone and nerves also makes it more susceptible to infection, further complicating the healing process.

How Long Should You Wait Before Smoking Again?

The question that most people want to know is: how long should I wait before smoking again? According to dental professionals, the general recommendation is to wait at least 72 hours (3 days) before smoking. However, that’s the minimum wait time. 7 to 10 days is the ideal timeframe, as this allows your gums to heal properly and reduces the chances of complications like dry socket.

While 7 days may sound like a long time for habitual smokers, it’s crucial to understand that smoking can have long-lasting effects on the healing process. The longer you can wait, the better the outcome. If you wait until the 7 to 10-day period, your gums will be more resilient to the effects of smoking.

How Can Smoking Affect Your Recovery Timeline?

The longer you wait to resume smoking, the more likely you are to heal without complications. Smoking introduces harmful substances into the mouth, which can not only disrupt the blood clot but also reduce the amount of oxygen available for healing tissues. If you can refrain from smoking for at least 7 days, you’re giving yourself the best chance for a swift recovery.

Additionally, it’s important to remember that smoking can interfere with your body’s natural healing mechanisms. It reduces the immune response, making it harder for your body to fight off infections. By waiting 7 to 10 days, you’re allowing your body the time it needs to heal and recover fully.

Tips for Protecting Your Healing Process If You Smoke

Use Alternatives to Smoking

If you’re finding it difficult to quit smoking entirely during the recovery period, consider using alternatives that are less harmful. Nicotine patches, gum, or lozenges can help curb cravings without introducing the risks associated with smoking. These alternatives help keep your nicotine levels stable without the negative side effects of smoking, like the potential for dry socket or gum irritation.

If you’re desperate for a quick fix, some people turn to e-cigarettes or vapes, but these should also be avoided in the first few days after surgery. The reason is that even though the smoke may not be as harmful, the suction and vapor can still cause the same issues as traditional smoking.

How to Minimize the Harm of Smoking

If you absolutely need to smoke, try the following tips to minimize the harm:

  • Use a straw: Using a smoking straw can reduce the direct contact between smoke and your extraction site, helping reduce the risk of dislodging the clot.

  • Avoid deep inhaling: When smoking, try not to inhale deeply. Shallow puffs can reduce the suction pressure on your gums and extraction sites.

  • Rinse your mouth: After smoking, rinse your mouth with saltwater to help keep the socket clean and reduce the risk of infection.

  • Keep it minimal: If you must smoke, try to limit the frequency to reduce the strain on your healing gums.

Avoid Smoking for as Long as Possible

The best advice is simple: wait as long as possible before smoking. While it’s tempting to return to your regular smoking routine after a few days, you can significantly speed up your recovery by taking it slow. Smoking just a few days later than you usually would can make a substantial difference in your healing process.

Frequently Asked Questions

Q1: Can I smoke immediately after wisdom teeth removal?
A1: No, it is highly recommended to avoid smoking for at least 3 to 5 days after wisdom teeth removal to prevent dry socket and other complications.

Q2: What are the risks of smoking after wisdom teeth removal?
A2: Smoking can delay healing, introduce bacteria into the wound, and cause dry socket, which can extend the recovery period and cause severe pain.

Q3: How long should I wait before smoking after wisdom teeth removal?
A3: It’s recommended to wait at least 7 to 10 days before smoking to minimize the risk of complications and promote faster healing.

Q4: Can using a straw help prevent dry socket?
A4: Using a straw should be avoided in the first few days after surgery as it can create suction, which may dislodge the blood clot and increase the risk of dry socket.

Q5: Can I vape after wisdom teeth removal?
A5: It’s best to avoid vaping in the first 7 days after your surgery because it can still introduce harmful substances and cause suction, which can disrupt the healing process.

Conclusion

The simple answer to the question, “Can I smoke 7 days after wisdom teeth removal?” is: it’s not ideal, but it’s not impossible. Smoking within 7 days of surgery can delay healing, increase your risk of complications like dry socket, and introduce bacteria into the extraction site. If you absolutely must smoke, try to limit your intake and follow all safety precautions. The more time you allow your body to heal, the better your chances for a smooth recovery.

The safest route is to avoid smoking for at least 7 days and even up to 10 days after wisdom teeth removal. This will significantly reduce your risk of complications and ensure a faster, more comfortable recovery. Always consult your dentist for personalized recommendations based on your recovery progress.

Dr. Bill Dorfman Net Worth: Overview of the Celebrity Dentist’s Fortune

Dr. Bill Dorfman, often referred to as “America’s Dentist,” is a household name in the world of cosmetic dentistry. Known for his role as the lead dentist on the popular TV show Extreme Makeover, Dr. Dorfman has transformed the lives of countless individuals by giving them new, dazzling smiles. His celebrity status, business ventures, and various investments have contributed significantly to his fortune. In this article, we will explore Dr. Bill Dorfman’s net worth, career, investments, and how he became one of the wealthiest and most influential dentists in the world.

Dr. Bill Dorfman Net Worth Overview

Dr. Bill Dorfman’s net worth is estimated to be between $20 million to $50 million, though the exact figure can vary depending on the sources. His wealth is attributed to his long and successful career in cosmetic dentistry, numerous business ventures, television appearances, and even book deals. Dr. Dorfman has successfully capitalized on his skills as a dentist and built an empire around his personal brand.

Dr. Bill Dorfman’s Early Career and Rise to Fame

Dr. Bill Dorfman was always passionate about dentistry. He graduated from the prestigious University of California, Los Angeles (UCLA), with a Doctor of Dental Surgery (DDS) degree. From the start, he focused on providing high-quality cosmetic dental procedures. His breakthrough came when he was chosen as the dentist for Extreme Makeover, a reality TV show that allowed him to showcase his skills in a dramatic way.

His ability to make over his patients’ smiles and boost their self-confidence quickly caught the attention of millions, which propelled him into the spotlight. The fame he gained through the show has played a significant role in building his wealth.

What Contributes to Dr. Bill Dorfman’s Net Worth?

1. Dentistry Career: A Highly Successful Practice

Dr. Dorfman’s expertise in cosmetic dentistry is what initially laid the foundation for his impressive net worth. As a cosmetic dentist, he specializes in procedures like veneers, teeth whitening, and other treatments aimed at improving the aesthetic appeal of a person’s smile. His practice, which caters to high-profile clients, has allowed him to build a successful dental practice in Los Angeles, one of the wealthiest cities in the world.

2. Media Appearances and Television Success

One of the key drivers of Dr. Dorfman’s fortune is his media presence. As the lead dentist on Extreme Makeover, he worked on numerous celebrity and non-celebrity patients alike. His television appearances introduced him to a global audience, which enhanced his reputation and ultimately helped build his brand.

In addition to Extreme Makeover, Dr. Dorfman has appeared on several other television shows, including The Doctors, Good Morning America, and The View. His consistent presence in the media has allowed him to maintain a high public profile, boosting his opportunities for other income streams.

Income Streams That Contribute to Dr. Bill Dorfman’s Net Worth

While his dental practice and television appearances have brought Dr. Dorfman fame, there are several other lucrative income streams that contribute significantly to his wealth.

1. Business Ventures

Dr. Dorfman’s entrepreneurial skills have greatly expanded his wealth. He has invested in various businesses and ventures, especially in the dental field.

Zoom! Teeth Whitening

Perhaps his most well-known business venture is Zoom! Teeth Whitening, which is a professional teeth-whitening system used in dental offices worldwide. Zoom! has become one of the most popular teeth-whitening products globally, contributing significantly to Dr. Dorfman’s net worth.

Other Dental Products

In addition to Zoom!, Dr. Dorfman has been involved in creating and endorsing a variety of dental products and technologies. His investments in the dental industry have helped him stay relevant and continue to build his wealth.

Real Estate Investments

Dr. Dorfman also invests in real estate, a common way for wealthy individuals to grow their portfolios. He owns a variety of properties, both residential and commercial, which generate passive income and enhance his net worth. Real estate investments have been a key strategy in ensuring financial security beyond his dental practice.

2. Book Deals and Publications

Dr. Dorfman is also an accomplished author. His book, The Smile Guide, provides insight into his methods and the importance of oral health. His expertise and visibility in the media have helped him sell thousands of copies, further adding to his wealth.

In addition to this book, he has written several other works and articles, sharing his insights into cosmetic dentistry, which has led to lucrative publishing deals.

Breakdown of Dr. Bill Dorfman’s Net Worth Sources

Source Estimated Contribution Details
Dentistry Career $10 – $15 million Dr. Dorfman’s high-profile dental practice, specializing in cosmetic dentistry.
Zoom! Teeth Whitening $5 – $10 million Co-founder of Zoom! Teeth Whitening, a widely used professional teeth-whitening system.
Real Estate Investments $3 – $5 million Dr. Dorfman’s investments in luxury real estate properties in Los Angeles.
Media Appearances $2 – $3 million Income from appearances on shows like Extreme Makeover and The Doctors, as well as other media ventures.
Book Deals $500K – $1 million Earnings from Dr. Dorfman’s books, including The Smile Guide and other related publications.
Other Investments $2 – $3 million Various dental products and business investments.

1. Investment in Technology

Dr. Dorfman’s commitment to remaining at the forefront of dental technology has allowed him to continually expand his business. He invests in the latest equipment and dental technologies that not only benefit his practice but also his brand. Staying updated with the latest trends has been instrumental in growing his wealth and sustaining his business success.

2. Charitable Contributions

Despite his wealth, Dr. Dorfman has made it a point to give back to the community. He is actively involved in charitable causes, particularly those focused on dental health, education, and medical advancements. His philanthropic efforts have helped improve the lives of many people in need and further cemented his reputation as a well-rounded public figure.

3. Diversification of Income Sources

One of the reasons Dr. Dorfman has maintained such a large net worth is his ability to diversify his income sources. He doesn’t rely solely on his dental practice or TV appearances; he has branched out into real estate, product endorsements, and other business ventures. This approach has allowed him to build a diversified portfolio that protects his wealth from market fluctuations.

The Impact of Dr. Bill Dorfman’s Personal Branding on His Net Worth

Dr. Dorfman has mastered the art of personal branding. He has positioned himself as a celebrity dentist and has made use of his TV appearances, social media presence, and public relations strategies to build a brand that people trust. His association with high-profile individuals and luxury services has contributed significantly to his overall net worth.

The way Dr. Dorfman brands himself as not just a dentist but as an expert in cosmetic enhancements has given him an edge in the competitive world of dentistry. His personal brand extends beyond his clinic, turning him into an entrepreneur and public figure who is able to command attention and business deals.

Conclusion

Dr. Bill Dorfman’s net worth reflects his remarkable journey from a dedicated cosmetic dentist to a global brand. His story is one of vision, hard work, and the willingness to seize opportunities in various fields, from business ventures and investments to media appearances. His expertise, coupled with his entrepreneurial mindset, has allowed him to build a fortune that goes far beyond his original practice.

Dr. Dorfman’s ability to diversify his income streams, coupled with his continued passion for dentistry and philanthropy, ensures that his wealth will likely continue to grow in the coming years. His success is a reminder that with a combination of skill, strategy, and perseverance, one can achieve both financial and professional greatness.

FAQ’s

1. How much is Dr. Bill Dorfman’s net worth?

Dr. Bill Dorfman’s net worth is estimated to be between $20 million and $50 million, depending on the source. His wealth stems from his dental career, media appearances, business ventures, and investments.

2. How did Dr. Bill Dorfman become famous?

Dr. Dorfman became famous as the lead cosmetic dentist on Extreme Makeover, where he helped transform the smiles of numerous individuals, leading to widespread recognition and media appearances.

3. What is Zoom! Teeth Whitening?

Zoom! is a teeth-whitening system co-founded by Dr. Dorfman. It is widely used in dental offices around the world and has become a highly successful product that significantly contributes to his net worth.

4. Does Dr. Bill Dorfman own any real estate?

Yes, Dr. Dorfman has invested in real estate, primarily in Los Angeles. His properties include both residential and commercial real estate investments, contributing to his overall wealth.

5. What other businesses has Dr. Bill Dorfman invested in?

In addition to Zoom! Teeth Whitening, Dr. Dorfman has invested in various dental products and technologies, further increasing his financial portfolio and business ventures.

6. What philanthropic work does Dr. Bill Dorfman do?

Dr. Dorfman is committed to giving back to the community, particularly in the areas of dental health, education, and medical advancements. His charitable efforts have made a positive impact on many lives.

D2160 Dental Code: A Comprehensive Guide for Patients and Dentists

The D2160 dental code is a vital component in the field of dentistry, specifically for restorative procedures. This code is part of the American Dental Association’s (ADA) Dental Procedure Codes, used to identify and classify various dental services. The D2160 code pertains to a particular type of restoration procedure—specifically, it is used for the treatment of extensive dental restorations, including crowns or other necessary treatments to restore damaged or decayed teeth. Understanding the D2160 code is essential for both patients and professionals in navigating insurance coverage, understanding treatment plans, and ensuring that dental services are appropriately classified for billing and reimbursement.

In this article, we will break down everything you need to know about the D2160 dental code, from its definition to its role in dental treatment, its costs, and more. We’ll also provide some helpful answers to common questions, making it easier for you to understand this dental code in depth.

What Does the D2160 Dental Code Cover?

The D2160 dental code refers to the procedure for the preparation and restoration of teeth with an extensive coverage procedure, typically involving crowns. In the dental world, a dental crown is often placed to restore a tooth that is damaged by decay, fracture, or other conditions. The D2160 code specifically refers to a crown that is used in a posterior tooth (a tooth located toward the back of the mouth), made of either porcelain fused to metal (PFM) or another material, and is often used in cases of significant decay or damage.

When a dentist performs a procedure covered by the D2160 code, they typically prepare the tooth by removing decayed or damaged parts, reshaping the tooth, and placing the crown to restore its function and appearance. The crown is designed to cover the remaining tooth structure and is cemented in place.

Why is the D2160 Dental Code Important for Patients and Dentists?

The D2160 code is important for both patients and dentists because it helps standardize procedures and billing practices. For patients, understanding the D2160 code means they can better comprehend the scope of the dental services they are receiving. It also ensures they know what to expect regarding costs and insurance coverage.

For dentists, the D2160 code helps with accurate documentation of services provided. It also facilitates the reimbursement process with insurance companies. Since dental insurance policies often have specific codes tied to coverage, knowing the correct codes, such as D2160, is crucial for a smooth claims process.

Insurance Coverage and the D2160 Code

Dental insurance can often be tricky to navigate, especially when it comes to coverage for restorative procedures like crowns. The D2160 code plays a key role in insurance billing and reimbursement. Since this code refers to a specific type of crown, understanding whether your dental plan covers this procedure is crucial.

Is the D2160 Code Covered by Dental Insurance?

Many dental insurance plans do cover the cost of crowns, but it depends on the specifics of your policy. Some plans might have a maximum coverage limit for crowns or may only cover certain types of materials for the crown. For instance, porcelain crowns or porcelain-fused-to-metal (PFM) crowns may be covered, but you might need to check the specifics of your policy to see if the D2160 code will be reimbursed.

What to Expect When Filing a Claim with the D2160 Code:

  • Pre-authorization: Some dental insurance providers require pre-authorization for crowns.

  • Out-of-pocket expenses: Even with insurance, patients may be responsible for co-pays or remaining balances.

  • Material limitations: Your plan might specify which materials are covered under the D2160 code.

By working with your dentist’s office, you can clarify which codes will be used and what your insurance will cover.

Common Procedures Associated with the D2160 Dental Code

The D2160 dental code is often used for procedures that involve the placement of a posterior crown. Here are some of the most common procedures that fall under this code:

  • Tooth Preparation: This includes the removal of decay and reshaping the tooth to fit the crown.

  • Impression: A mold of the tooth is taken to create the custom crown.

  • Temporary Crown: While waiting for the permanent crown, a temporary one may be placed.

  • Crown Placement: The permanent crown is fitted and cemented onto the tooth.

Costs of the D2160 Procedure

The cost of a procedure using the D2160 dental code can vary depending on factors such as location, materials used, and the complexity of the treatment. Typically, posterior crowns can range from $800 to $1,500 or more. Patients should discuss costs with their dental provider and consult their insurance to understand what portion will be covered.

Cost Factors to Consider:

  • Type of Material: Porcelain crowns tend to be more expensive than other types.

  • Geographic Location: Dental fees can vary depending on where you live.

  • Dentist’s Experience: Experienced dentists may charge higher fees.

It’s important to discuss payment options, including financing, with your dentist if cost is a concern.

FAQs About the D2160 Dental Code

Here are some frequently asked questions regarding the D2160 dental code:

Q1: Is the D2160 dental code used for front teeth?

No, the D2160 code is typically used for posterior teeth, located at the back of your mouth. Front teeth usually require different codes.

Q2: Can the D2160 code be used for dental bridges?

No, the D2160 code is specifically for crowns, not dental bridges. However, there are other ADA codes for bridgework.

Q3: Will my dental insurance cover the D2160 procedure?

It depends on your plan. Some insurance policies cover crowns, but you may need to check with your provider to confirm what is included under your specific policy.

Q4: How long does a crown placed under the D2160 code last?

Crowns can last anywhere from 5 to 15 years with proper care, though the lifespan varies depending on the material and care taken.

Q5: What is the difference between a D2160 and D2750 code?

The D2750 code refers to a full porcelain crown, whereas the D2160 is typically used for a porcelain-fused-to-metal crown.

Conclusion

Understanding the D2160 dental code is crucial for both patients and dental professionals. It ensures that dental procedures are performed and billed correctly, and it helps patients understand the types of treatments they are receiving. Whether you need a crown for a damaged tooth or are navigating insurance options, knowing the D2160 code can make the process much smoother. Always consult with your dentist to ensure you understand the treatments you’re receiving and to clarify any questions about insurance or costs.

How Long Does It Take for IV Sedation to Kick In

Intravenous (IV) sedation is one of the most effective and commonly used methods for calming patients during medical or dental procedures. The main advantage of IV sedation is that it works quickly, allowing healthcare providers to administer the right amount of sedative and maintain a controlled, safe level of sedation throughout the procedure. But how long does it take for IV sedation to kick in? This is a common question that many patients ask before undergoing sedation.

The truth is, the time it takes for IV sedation to take effect can vary depending on several factors. In this guide, we’ll explore what IV sedation is, how it works, the factors influencing how quickly it takes effect, and what you can expect during and after the procedure. Whether you’re about to undergo a dental cleaning, wisdom tooth extraction, or a more invasive surgery, understanding the sedative process can help you feel more at ease.

What Is IV Sedation and How Does It Work?

Overview of IV Sedation

IV sedation involves administering sedative drugs directly into the bloodstream through a vein, typically in your arm or hand. This method ensures the sedative acts quickly because it bypasses the digestive system and goes straight into the bloodstream. Unlike oral medications, which need to be digested and metabolized before they can take effect, IV sedation provides near-instantaneous relief.

IV sedation is used in a wide range of procedures, from minor dental work to major surgeries. The primary purpose is to help patients relax, alleviate anxiety, and make the procedure more comfortable. In some cases, the goal is to keep the patient awake but calm, while in others, it might induce a deep sleep-like state, allowing the surgeon or dentist to work more efficiently and comfortably.

How IV Sedation Differs from Other Sedation Methods

IV sedation differs significantly from oral sedation and nitrous oxide (laughing gas). Oral sedation, for example, takes longer to take effect because the medication must pass through the digestive system. Nitrous oxide is fast-acting but wears off almost immediately after administration stops. IV sedation, however, offers a controlled level of sedation that can last the entire length of the procedure, ensuring that patients remain calm, comfortable, and unaware of any discomfort.

For dental and medical professionals, IV sedation allows them to manage the level of sedation more precisely, adjusting it as needed during the procedure.

Factors That Affect the Onset of IV Sedation

There are several key factors that can influence how quickly IV sedation begins to take effect. These factors include the type of sedative used, the patient’s body weight and metabolism, any pre-existing health conditions, and the speed at which the drug is administered.

Type of Sedative Used

Not all sedatives are created equal. The specific sedative administered during your procedure plays a significant role in how fast it takes effect. Some commonly used sedatives include:

  • Midazolam: A fast-acting sedative that is commonly used for dental procedures and other minor surgeries. It usually takes effect within 1-3 minutes after injection.

  • Propofol: Known for its rapid onset, propofol is often used for more invasive surgeries. Its effects are felt within minutes.

  • Diazepam (Valium): This sedative is used for longer procedures, and while it still works quickly, its effects might be slightly more gradual compared to others.

The exact time it takes for sedation to kick in depends on the drug used. Some sedatives start working within seconds, while others may take a few minutes.

Patient’s Weight and Metabolism

Your body weight and metabolism can significantly influence how quickly the sedative reaches its peak effect. Individuals with a higher body fat percentage may experience a slower onset of sedation since fat cells can store the sedative for longer periods. Conversely, individuals with a higher muscle mass or faster metabolism may feel the effects sooner.

Pre-Existing Health Conditions

Certain health conditions can slow down or speed up the process of how the body absorbs and metabolizes IV sedatives. Liver or kidney issues, for example, may delay the breakdown of sedatives, causing the drug to take longer to take effect. Other conditions, like obesity or diabetes, may affect how the sedative is absorbed into the bloodstream.

Dosage and Administration Speed

The dosage and the speed at which the sedative is administered can also impact the onset time. If a higher dose is given, or the sedative is delivered more rapidly, patients may feel the effects quicker. However, if the dosage is lower or the sedative is delivered slowly, it may take longer to feel the effects.

General Timeframe for IV Sedation to Kick In

For most patients, IV sedation takes effect within 1 to 3 minutes. This makes it a preferred choice for those needing quick and effective sedation. You’ll typically begin to feel the effects almost immediately, with the first signs being a sense of relaxation or drowsiness.

While the onset is rapid, the duration of sedation can vary. For minor procedures, the sedation might wear off after about 30 minutes to an hour. For longer procedures, the effects can last several hours, especially if additional doses are administered throughout the procedure.

What to Expect During and After IV Sedation

Physical Sensations During IV Sedation

Most patients report feeling relaxed and calm once the sedative begins to take effect. Depending on the dosage, the experience can range from feeling drowsy and sleepy to feeling completely unconscious. Some patients also report experiencing a mild euphoria or a sense of detachment, making the procedure feel less intrusive.

The good news is that because IV sedation works so quickly, there is usually very little anxiety before the procedure begins. The sedative takes away the fear of needles or discomfort, allowing you to be more at ease during the treatment.

Duration of Effects

As the sedative wears off, most people start to feel awake and alert within 1-2 hours after the procedure. However, it’s important to note that while you may appear awake, the sedative’s effects may still be lingering. You may feel groggy, dizzy, or somewhat disoriented immediately after the procedure. It’s also common to experience memory gaps, especially if a higher dose was used.

Possible Side Effects

While side effects are rare, some patients may experience:

  • Nausea or Vomiting: Some individuals may feel mildly nauseous after the sedation wears off.

  • Dizziness or Lightheadedness: Due to the effects of the sedative, you may feel unsteady after the procedure.

  • Confusion or Disorientation: The sedative can cause mild confusion, which usually resolves as it leaves your system.

Frequently Asked Questions (FAQs)

1. How long does IV sedation last?

The duration of IV sedation depends on the type of sedative and the length of the procedure. Generally, it lasts between 30 minutes to several hours, with the effects fading as the sedative wears off.

2. Can IV sedation make you forget the procedure?

Yes, many sedatives used in IV sedation cause amnesia, so patients often have little to no memory of the procedure itself. This is one of the reasons it’s preferred for procedures that may cause anxiety.

3. Is IV sedation safe?

IV sedation is safe when administered by a trained professional. It is closely monitored during the procedure, and safety measures are in place to ensure the patient’s health and well-being.

4. Can I drive after IV sedation?

No, you should not drive after receiving IV sedation. The sedative can impair your judgment, reaction time, and coordination, which makes it unsafe to operate a vehicle.

5. How quickly do I recover from IV sedation?

Recovery from IV sedation varies but typically takes between 1-2 hours. Afterward, you may still feel groggy, and it’s important to have someone accompany you home.

6. What should I avoid after IV sedation?

Avoid consuming alcohol, operating heavy machinery, and engaging in strenuous activities for at least 24 hours. Additionally, rest and stay hydrated to help your body recover from the sedation.

Conclusion

IV sedation is a powerful tool used to help patients undergo medical and dental procedures with minimal discomfort. The sedative typically takes effect within 1 to 3 minutes, depending on the type of drug used and other factors such as your body weight, metabolism, and overall health. The fast-acting nature of IV sedation makes it ideal for procedures that require patients to be relaxed and pain-free, yet awake and aware during the process.

While the sedative’s effects are generally safe, always ensure you have a trusted medical professional administering the sedation and monitoring your health throughout the procedure. Post-sedation recovery is typically smooth, but be prepared for a period of grogginess as the sedative wears off. Always follow the aftercare instructions provided by your healthcare provider to ensure a safe and swift recovery.

How Long After Dental Bridge Can I Eat

Getting a dental bridge is a significant step towards restoring your smile and improving your dental health. However, post-procedure care is essential for ensuring your dental bridge stays in place and your recovery is smooth. One common question that arises after getting a dental bridge is, “How long after dental bridge can I eat?” This question is critical, as eating too soon or consuming the wrong foods can interfere with healing, causing discomfort or damage to the dental work. In this article, we will discuss the recommended waiting times for eating after receiving a dental bridge, foods to avoid, and tips for a speedy recovery.

How Long Should You Wait Before Eating After Getting a Dental Bridge?

The Immediate Aftercare Period

When you first get your dental bridge, it’s essential to follow your dentist’s instructions carefully. For the first few hours post-procedure, you may be advised to avoid eating altogether. The reason behind this is that your gums and teeth may be sensitive due to the procedure, and the temporary discomfort could worsen if food is introduced too soon.

Waiting for the Anaesthesia to Wear Off

You should wait until the local anaesthesia wears off before attempting to eat. The anaesthesia helps numb the area during the procedure but also makes your mouth feel tingly and numb. Attempting to eat while still numb can lead to biting the inside of your cheek or tongue, which can cause unnecessary pain or injury.

Foods to Avoid After Getting a Dental Bridge

Hard Foods and Crunchy Snacks

After receiving your dental bridge, it’s essential to avoid hard and crunchy foods that could potentially damage or loosen your dental work. Some foods to avoid include:

  • Ice cubes

  • Hard candy

  • Popcorn

  • Raw vegetables (carrots, celery)

  • Nuts and seeds

Sticky Foods That Can Damage Your Dental Bridge

Sticky foods can create pressure on your new dental bridge and increase the risk of loosening or damaging it. Avoid these foods:

  • Chewing gum

  • Caramel or taffy

  • Chewy candies (like gummy bears)

Recommended Time to Wait Before Eating After Dental Bridge Procedure

First 24 to 48 Hours After Getting a Dental Bridge

It is advised to wait at least 24 hours after getting your dental bridge before eating any foods. During this period, your gums will still be healing, and the dental bridge may still be settling in place. You should focus on soft foods like:

  • Smooth soups

  • Mashed potatoes

  • Yogurt

  • Scrambled eggs

After 48 Hours: Gradually Introduce Softer Foods

After the first 48 hours, you can begin to reintroduce softer foods into your diet, but you should continue to avoid overly hot or cold foods, as they can cause discomfort. You may opt for foods such as:

  • Pasta

  • Soft fruits (like bananas)

  • Cooked vegetables

  • Soft sandwiches

Full Recovery: Eating Normally Again

After a few days to a week, depending on your dentist’s recommendations, you can resume a normal diet. However, during this phase, it’s still crucial to be gentle with your new dental bridge. Avoid chewing directly on the bridge, especially hard or sticky foods.

Understanding the Healing Process of a Dental Bridge

The healing time after getting a dental bridge can vary depending on several factors, including the complexity of the procedure and the type of bridge used. While most patients can resume normal activities after a few days, the healing process should be carefully monitored to avoid complications.

How to Maintain a Healthy Diet During Recovery

While recovering from your dental bridge procedure, it’s crucial to maintain a healthy diet to support healing. Nutrient-rich foods will help speed up the recovery process and ensure your gums heal correctly. Consider including:

  • Protein-rich foods (like fish, chicken, and tofu)

  • Vitamin-rich fruits and vegetables

  • Soft whole grains (like oatmeal)

FAQs

Q1: Can I eat immediately after getting a dental bridge?

No, you should wait at least 24 hours after the procedure before eating to allow your gums and the bridge to settle. Eating too soon may cause discomfort or damage.

Q2: How long should I avoid chewing on the side of the dental bridge?

For at least the first 48 hours, try to avoid chewing on the side of the dental bridge to reduce pressure on the healing area.

Q3: Is it okay to eat hot or cold foods after a dental bridge?

It’s best to avoid hot and cold foods during the first few days as your mouth may be sensitive. Gradually introduce these once you feel comfortable.

Q4: Can I drink liquids immediately after getting a dental bridge?

Yes, drinking liquids is typically fine. However, avoid drinking very hot or cold beverages during the initial recovery period to avoid discomfort.

Q5: How do I know when it’s safe to return to my regular diet after getting a dental bridge?

You can return to your regular diet once your dentist confirms that your dental bridge is secure and your gums have healed. This usually happens within a week.

Conclusion

In conclusion, the amount of time you should wait before eating after receiving a dental bridge depends on your unique situation and your dentist’s advice. Generally, it’s advisable to wait at least 24 hours before consuming food and to avoid hard, sticky, and hot foods for the first few days. Gradually reintroduce softer foods as your recovery progresses, and always follow your dentist’s post-procedure instructions. By taking proper care of your dental bridge and adhering to a recovery timeline, you will ensure its longevity and functionality, keeping your smile bright and healthy for years to come.

D9222 Dental Code Explained: Why It’s Important for Your Practice’s Success

In the world of dentistry, accurate coding is essential for the proper reimbursement and documentation of services provided to patients. Among the various codes used, the D9222 dental code stands out. This specific code is used for billing purposes related to the administration of general anesthesia and sedation during dental procedures. Understanding the nuances of this code ensures that dental professionals are compensated correctly for the services they provide while maintaining compliance with industry regulations. In this article, we will explore the D9222 dental code, its application, and how it influences the billing process, helping you navigate the complexities of dental coding.

What is the D9222 Dental Code?

The D9222 dental code refers to the billing code used for the administration of general anesthesia or intravenous sedation during dental procedures. It falls under the category of sedation codes used by dental professionals to report the services rendered when a patient is sedated for a procedure. The D9222 code specifically denotes the use of deep sedation or general anesthesia, which can significantly alter the complexity of the procedure and the level of care required.

Understanding the Scope of D9222 Code

This code is used primarily for billing when patients undergo surgeries or treatments that require deep sedation or general anesthesia, rather than just local anesthesia or mild sedation. It helps ensure the dentist or the anesthesia provider receives proper compensation for the sedation services, reflecting the additional time and expertise required for the safe administration of anesthesia.

How is the D9222 Dental Code Used in Practice?

The D9222 dental code is commonly used during more invasive dental procedures, such as wisdom tooth extractions, dental implants, or other major surgeries. It is particularly beneficial when the patient requires deeper sedation to manage anxiety or pain, ensuring they remain comfortable throughout the procedure.

When is D9222 Code Applied?

  • For major dental surgeries: Such as full-mouth reconstructions, implant surgeries, and wisdom tooth removals.

  • For patients with anxiety or special needs: Who may require general anesthesia to tolerate the procedure.

  • In hospital settings: Where dental surgeries are performed under the supervision of anesthesiologists.

  • For procedures that require long operation times: Which necessitate deep sedation or general anesthesia.

Detailed Breakdown of D9222 Code Application in Billing

Understanding the application of the D9222 dental code is crucial for both dental professionals and insurance companies. This code ensures that the costs associated with sedation are clearly accounted for, which can be a significant portion of the overall treatment cost.

How Billing Works with D9222

  1. Insurance Verification: Before administering general anesthesia, dental offices must confirm that the patient’s insurance covers sedation costs.

  2. Code Usage: After the procedure, the D9222 dental code is used to accurately report the sedation service provided.

  3. Reimbursement Process: The dental office receives compensation for the sedation service, which may differ from the reimbursement for the actual dental procedure.

Important Considerations for Dentists

  • Proper documentation is required to support the use of D9222.

  • Some insurers may require additional information or justification for why the code was used, such as medical records or a treatment plan outlining the need for deep sedation.

The Role of D9222 in Patient Care and Safety

The administration of anesthesia is not without risks. As a result, the D9222 dental code emphasizes the importance of patient safety during sedation. Anesthesia requires careful monitoring and expertise to ensure that patients remain stable throughout their procedure.

Key Points for Safe Anesthesia Practice

  • Qualified personnel: Ensure that certified anesthesia providers are involved.

  • Monitoring equipment: Proper monitoring of heart rate, oxygen levels, and other vital signs.

  • Post-sedation care: Follow-up care and observation to ensure the patient recovers from sedation safely.

Common Misconceptions About the D9222 Dental Code

Like any complex system, the use of dental codes, including D9222, is subject to misconceptions and confusion. These misunderstandings can lead to billing errors, denials, or missed opportunities for appropriate reimbursement.

Clarifying Common Myths

  • Myth 1: The D9222 Code Is Only Used for Major Surgery
    While the D9222 code is often associated with major surgeries, it can also apply to less invasive procedures that require deep sedation.

  • Myth 2: Insurance Covers All Sedation Procedures
    Not all insurance plans cover sedation, and the use of D9222 may be denied if proper documentation or justification is not provided.

  • Myth 3: D9222 Is the Same as Local Anesthesia
    The D9222 code is distinct from local anesthesia codes and reflects a higher level of sedation or general anesthesia.

Frequently Asked Questions (FAQs)

1. What does the D9222 dental code cover?

The D9222 dental code covers the administration of general anesthesia or deep sedation during dental procedures. It ensures proper reimbursement for the sedation services provided.

2. Is D9222 used for all dental procedures?

No, the D9222 code is used for procedures that require deep sedation or general anesthesia, typically during major surgeries or treatments involving significant patient anxiety or discomfort.

3. Does insurance always cover the D9222 code?

Insurance coverage for the D9222 dental code can vary. It’s essential to verify with the patient’s insurance provider whether the sedation costs are covered under their plan.

4. How does the D9222 code affect billing?

The D9222 code helps dental practices bill separately for the sedation service, ensuring that anesthesia providers are properly compensated for the additional care involved in administering deep sedation.

5. Can a patient choose to use D9222 for minor procedures?

While the D9222 code is typically used for major surgeries or complex dental treatments, a dentist may apply it for minor procedures if deep sedation is deemed necessary for the patient’s comfort.

6. What should I do if my D9222 claim is denied?

If a D9222 claim is denied, review the insurance policy for specific requirements regarding sedation and anesthesia services. Ensure all necessary documentation and justification for the procedure are submitted.

Conclusion

The D9222 dental code plays a pivotal role in the dental industry by ensuring that dental professionals are compensated appropriately for providing essential sedation services. By understanding the correct application of this code, dental practices can ensure compliance with insurance policies, provide better patient care, and streamline the billing process. Ensuring that all parties involved, from patients to insurance companies, understand the significance of D9222 promotes a smoother, more efficient dental treatment experience.

1 3 4 5 6 7 11