Author: Julie Graham

Why is a Dental Crown So Expensive

Dental crowns are a common and essential dental procedure, used to restore teeth that are decayed, cracked, or otherwise damaged. While the purpose of a dental crown is straightforward – to protect and restore a tooth’s function – one question often arises: Why is a dental crown so expensive?

The cost of dental crowns can range anywhere from $800 to $3,000 per tooth, depending on various factors. The high price tag of dental crowns might seem daunting for patients, especially when they are not entirely sure why the procedure costs so much. In this comprehensive guide, we will delve into the main reasons that contribute to the steep costs of dental crowns and offer strategies for managing the financial impact.

From the materials used in the crowns to the expertise of the dentist and location of the dental practice, we will cover all the elements that factor into the pricing. Whether you’re considering a dental crown for yourself or just curious about the process, this article will give you a full understanding of why dental crowns are priced the way they are and what you can do about it.

Why is a Dental Crown So Expensive? Understanding the Key Factors

When considering the cost of a dental crown, there are several significant factors that influence the price. These include the type of material used, the complexity of the procedure, the expertise of the dentist, and the technology involved in the creation of the crown. Let’s explore these factors in more detail to understand why crowns can be so costly.

The Materials Matter: What Type of Crown is Right for You?

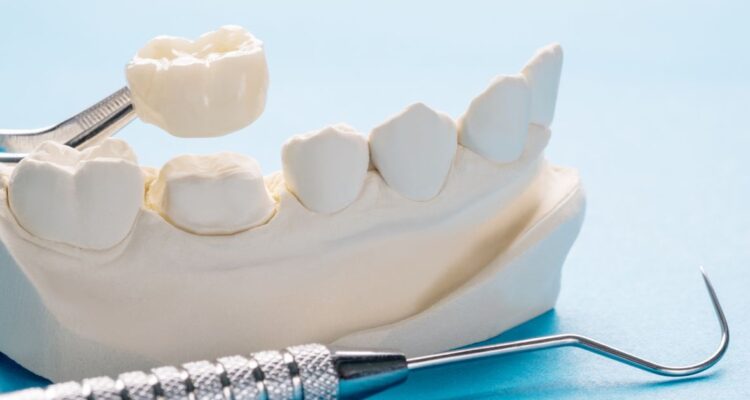
The material used in the creation of a dental crown plays one of the most significant roles in determining its cost. Different materials offer various benefits in terms of durability, aesthetics, and cost-effectiveness. Here are some of the most common types of dental crowns:

Porcelain Crowns

Porcelain crowns are often the most expensive type due to their high aesthetic value. These crowns are designed to mimic the natural look of your teeth, making them a great option for those who want a natural, seamless smile. However, porcelain crowns require advanced technology and highly skilled professionals to create, which increases the overall cost.

  • Aesthetic Appeal: The porcelain material is highly translucent, giving it the ability to blend in with your natural teeth.

  • Durability: Although porcelain is durable, it’s more prone to chipping than metal crowns, which may be a concern for patients who need more long-lasting options.

  • Labor-Intensive Creation: Porcelain crowns are often handcrafted and require precision to ensure that they fit perfectly, contributing to their high price.

Metal Crowns

Metal crowns, often made from gold, are among the most durable types of crowns. However, they come with a higher price tag because of the precious metals used in their construction.

  • Gold Crowns: Known for their strength and durability, gold crowns can last 20 years or more. They are highly resistant to wear and tear, making them an excellent choice for back teeth that undergo heavy chewing forces.

  • Other Metals: Some crowns are made from non-precious alloys or a combination of metals, which can help reduce costs but still provide a high level of durability.

Try Our Dental Calculators

Dental Procedure Cost Estimator Dental Implant Cost Calculator

Porcelain-Fused-to-Metal Crowns

This type of crown combines the strength of metal with the aesthetic qualities of porcelain. These crowns are typically more affordable than full porcelain crowns, but they still carry a significant price due to the labor involved in creating them and the need for both metal and porcelain materials.

Dental Expertise and the Dentist’s Skill Set

The cost of a dental crown is not just about materials, but also about the skill and experience of the dentist performing the procedure. A dentist who specializes in cosmetic dentistry or restorative procedures often charges more because of their advanced skills and the time spent on the procedure.

Time and Precision

Placing a dental crown is a time-intensive procedure that requires precision and care. The dentist must take impressions of the tooth, prepare the tooth to fit the crown, and ensure that the crown fits perfectly before bonding it in place. A skilled dentist who ensures that the crown fits perfectly without discomfort or complications will charge more for their expertise.

  • Experience and Training: A highly experienced dentist with years of training in crowns will often charge higher fees due to their expertise and the quality of their work.

  • Complicated Cases: If the case is more complex, such as a root canal or the need for a full mouth restoration, the costs will naturally rise.

Dental Laboratory Costs: The Hidden Expense

The creation of a dental crown involves more than just the dentist’s expertise. A dental lab must create the crown based on the specifications provided by the dentist. These labs employ skilled technicians who craft the crowns by hand or using advanced technology, such as CAD/CAM systems.

  • Laboratory Fees: Dental labs charge dentists for their services, which can increase the overall cost of the crown. These fees are passed on to the patient.

  • CAD/CAM Technology: Modern technology, like CAD/CAM, allows for precision crafting of crowns, but it comes with its own costs. While CAD/CAM systems improve accuracy and reduce chair time for patients, they also require substantial investment by the dental lab, contributing to higher costs.

Location of the Dental Practice: How Geography Affects Pricing

Just as with any other service, the location of the dental practice plays a significant role in the price of dental crowns. Dentists in larger cities or high-cost-of-living areas will often charge more due to increased overhead costs, such as rent, utilities, and employee wages.

Urban vs. Rural Practices

  • Urban Areas: Dentists in urban areas often charge more for their services because of the higher operational costs in these regions. The higher the cost of living, the higher the price you can expect to pay for dental procedures like crowns.

  • Rural Practices: On the other hand, dental offices in rural areas may offer crowns at a lower price, as their overhead costs tend to be lower. However, the expertise of dentists in these areas may vary, so it’s important to consider both cost and quality.

Why Dental Crowns Are a Long-Term Investment

While the upfront cost of a dental crown may seem high, it is important to recognize the value that these crowns offer in terms of durability, functionality, and aesthetic improvement.

Restoring Function and Appearance

Dental crowns are designed to restore the function of a damaged tooth and improve its appearance. When a tooth is cracked or severely decayed, a crown can protect it from further damage and preserve its function for many years. Without a crown, the tooth may deteriorate further, leading to the need for more expensive treatments down the road, such as a root canal or even tooth extraction.

How to Manage the Cost of a Dental Crown

Given the potential costs associated with dental crowns, many patients seek ways to manage the expense. Here are some practical tips for managing the costs of dental crowns:

  • Dental Insurance: Many dental insurance plans offer coverage for crowns, but it’s important to understand the specifics of your policy. Typically, dental insurance covers a portion of the cost, but it may not cover the full amount.

  • Payment Plans: Many dental offices offer financing or payment plans, allowing you to pay for your dental crown over time. This can help make the procedure more affordable.

  • Dental Schools: If you’re looking to save money, consider visiting a dental school where students perform procedures under the supervision of experienced instructors. These treatments are often offered at a lower cost.

  • Shop Around: It’s always a good idea to get multiple quotes from different dental offices to compare prices. Different dentists may offer varying rates for the same procedure.

Frequently Asked Questions (FAQs)

Why are porcelain crowns so expensive?

Porcelain crowns are expensive because of the high-quality material and the intricate craftsmanship required to create them. Additionally, they offer superior aesthetic value, which increases their cost.

Are gold crowns cheaper than porcelain crowns?

Gold crowns tend to be more expensive than porcelain crowns because of the cost of the gold material. However, gold crowns are extremely durable and can last much longer than porcelain crowns.

How long do dental crowns last?

Dental crowns typically last between 5 and 15 years, depending on the material used and how well the crown is cared for. Metal crowns tend to last longer than porcelain crowns.

Can dental crowns be covered by insurance?

Yes, many dental insurance plans cover a portion of the cost of crowns. However, the coverage varies, and it is important to check your policy to understand what is covered.

Are there any affordable alternatives to dental crowns?

Resin crowns and dental bonding are more affordable alternatives to traditional crowns, though they may not offer the same level of durability and aesthetics.

Why is it important to get a dental crown?

A dental crown helps restore the function and appearance of a damaged tooth, preventing further decay or damage and ensuring long-term oral health.

Conclusion

In conclusion, while dental crowns can be expensive, the cost is generally justified by the materials used, the expertise of the dentist, and the technology involved. Crowns are a long-term investment in your dental health, providing protection and restoring the function and appearance of a damaged tooth.

Before opting for a dental crown, it’s important to consider all the factors, from materials to location, and explore financing options if necessary. Understanding the breakdown of these costs will help you make an informed decision and prepare financially for the procedure.

How to Stop Biting Your Cheek After Wisdom Teeth Removal

After wisdom teeth removal, many patients experience the frustrating problem of accidentally biting their cheek. This can cause discomfort, pain, and slow the healing process. It’s a common occurrence, especially in the days following the surgery. The combination of swelling, numbness from anesthesia, and altered jaw alignment can make it difficult to control your mouth movements. Luckily, there are several strategies you can use to stop biting your cheek, promote healing, and improve your comfort during the recovery process. In this guide, we’ll explore everything you need to know about how to stop biting your cheek after wisdom teeth removal, including effective tips, remedies, and strategies to help you avoid this painful problem.

Why Do You Bite Your Cheek After Wisdom Teeth Removal?

Understanding the reasons behind accidental cheek biting is essential to prevent it. After wisdom teeth removal, several factors contribute to the increased risk of cheek biting:

  • Swelling and Discomfort: After surgery, the jaw area becomes swollen and tender, which makes it difficult to control the movements of the mouth. Swelling can shift the position of your teeth, which increases the chances of biting your cheek without realizing it.

  • Numbness from Anesthesia: The local anesthesia administered during the procedure numbs the gums, teeth, and surrounding tissues. While this is effective for pain management during the procedure, the numbness can continue for hours or even days afterward. Without full sensation in the mouth, you may not be able to feel when you’re accidentally biting your cheek.

  • Jaw Misalignment: When wisdom teeth are removed, the alignment of your jaw can temporarily change due to swelling, bone gaps, or changes in the way your teeth fit together. This misalignment can cause the upper and lower jaws to come together in an unusual way, leading to more frequent accidental cheek bites.

Tips to Prevent Biting Your Cheek After Wisdom Teeth Removal

There are several strategies that can help reduce the likelihood of biting your cheek while you heal from wisdom teeth removal. Implementing these methods will ensure a smoother recovery process and prevent unnecessary discomfort.

1. Use a Soft Diet

  • Avoid Hard and Crunchy Foods: After wisdom teeth removal, it’s essential to stick to a soft diet for at least a few weeks. Foods like mashed potatoes, soups, smoothies, and yogurt are easy to chew and won’t put undue strain on your jaw. Crunchy and tough foods, such as raw vegetables, nuts, and hard meats, can force your jaw into an awkward position, increasing the risk of cheek biting.

2. Apply Cold Compresses

  • Reduce Swelling and Numbness: A cold compress can help reduce the swelling in the jaw and surrounding tissues. Apply a cold compress to your face for 15–20 minutes at a time. This will help numb the pain and minimize the discomfort that could contribute to unconscious cheek biting.

  • Better Jaw Alignment: Swelling can also distort the alignment of your mouth and teeth. By applying ice, you’ll reduce swelling, which in turn helps to realign your bite and minimize the risk of accidentally biting your cheek.

3. Keep Your Mouth Moisturized

  • Use Lip Balm and Saline Rinses: Dryness in the mouth can lead to discomfort and a greater likelihood of cheek biting. Dry skin can make the mouth feel tight and uncomfortable, leading to involuntary movements like biting the inside of your cheek. Use lip balm or saline rinses to keep your mouth and lips hydrated. This will ensure a more comfortable recovery.

4. Be Mindful of Your Chewing Movements

  • Slow Down and Take Small Bites: After wisdom teeth removal, chewing can be tricky. Slow down and take smaller bites when eating. This will help you control your jaw movements better, reducing the risk of accidental cheek biting. It’s also essential to chew on the opposite side of the mouth if you have discomfort or swelling on one side. By taking smaller bites and chewing carefully, you can minimize the chances of injury to your cheek.

How Long Will It Take for the Cheek Biting to Stop?

One of the most common concerns after wisdom teeth removal is how long it will take for the cheek biting to subside. The length of time varies depending on several factors, including how well you manage post-operative care and the extent of your recovery. Here’s a rough timeline of what to expect:

First Few Days:

The first few days after the procedure are typically when cheek biting occurs the most. Anesthesia, swelling, and pain can impair your ability to feel and control your mouth, leading to more frequent cheek bites. During this time, you’ll also experience some discomfort, which may worsen the tendency to bite your cheek accidentally.

1-2 Weeks:

By the end of the first week or two, most of the swelling will have gone down. The numbness should wear off, and you’ll start regaining better control over your mouth movements. At this point, cheek biting should become less frequent. However, it’s still important to follow a soft diet and continue with your post-surgery care to prevent further injuries.

3-4 Weeks:

By the end of the first month, the discomfort and swelling should be significantly reduced. The tissues in your mouth will have healed enough that you can begin eating normal foods again without risking further cheek injury. Most people find that they no longer bite their cheek by this point, but if it persists, consult your dentist for further guidance.

Using Oral Devices to Prevent Cheek Biting

If you’re still struggling with cheek biting, there are a few oral devices that may help. These devices can act as a barrier to protect your cheek from accidental bites and allow the affected area to heal properly.

1. Dental Guards

  • Custom-Made Protective Barrier: A dental guard is a protective device that fits over your teeth and gums. It acts as a barrier between your teeth and the inside of your cheek, preventing direct contact and reducing the risk of bites. A dental guard can be especially useful while you sleep or if you find yourself unconsciously biting your cheek during the day.

  • Mouthguards are often recommended for patients who have severe discomfort or persistent issues with cheek biting.

2. Orthodontic Wax

  • Temporary Cushion for Relief: If you have any sharp edges on your teeth after wisdom teeth removal, orthodontic wax can be used to cover those edges temporarily. The wax will cushion the inside of your cheek from the sharp surfaces, preventing further injury and providing some relief during the healing process.

Importance of Good Oral Hygiene During Recovery

Maintaining good oral hygiene after wisdom teeth removal is crucial to avoid infections and support the healing process. A clean mouth is less likely to develop complications, and keeping the surgical area free from food particles can prevent additional discomfort.

  • Gentle Brushing: After surgery, brush your teeth gently with a soft-bristled toothbrush. Avoid brushing directly over the extraction site until it’s fully healed, as this can irritate the area.

  • Rinse with Salt Water: Rinsing with a warm saline solution is an excellent way to promote healing while keeping your mouth clean. Salt water helps reduce inflammation, prevent infection, and keep the surgical sites clean without causing irritation.

Managing Pain and Swelling Effectively

Pain and swelling are common after wisdom teeth removal. Managing these symptoms properly will improve your comfort and reduce the chances of cheek biting.

1. Over-the-Counter Pain Relief

  • Pain Management: Taking over-the-counter pain relievers such as ibuprofen can help manage discomfort. These medications also reduce inflammation, which can help ease swelling and make it easier to control jaw movements.

2. Keep Your Head Elevated

  • Reduce Swelling: Swelling in the jaw area can make cheek biting more likely. Elevating your head while resting can help reduce this swelling. Prop yourself up with pillows when lying down or sleeping to keep your head raised.

Frequently Asked Questions (FAQs):

1. How long does it take to stop biting your cheek after wisdom teeth removal?

It typically takes anywhere from a few days to a few weeks for the cheek biting to subside, as swelling decreases and sensation returns.

2. Is cheek biting normal after wisdom teeth removal?

Yes, it is common in the days following surgery, especially due to anesthesia, swelling, and jaw misalignment.

3. Can a dental guard help with cheek biting?

Yes, dental guards act as a barrier and can help protect the inside of your cheek from accidental bites.

4. What foods should I avoid to reduce cheek biting?

Avoid hard, crunchy, or sticky foods, as they can lead to awkward jaw movements that increase the risk of biting your cheek.

5. Should I consult my dentist if I keep biting my cheek?

If cheek biting persists or worsens, it’s a good idea to consult your dentist to ensure there are no complications or underlying issues.

Conclusion:

Cheek biting after wisdom teeth removal is a common and frustrating problem, but with the right care and attention, it can be managed effectively. By following a soft diet, reducing swelling, and using oral devices like dental guards, you can improve your comfort and prevent further cheek injuries. Most importantly, the issue should subside as you heal, but if it persists or worsens, consulting your dentist is important to ensure there are no complications. By taking the steps outlined in this guide, you’ll be on your way to a smooth recovery and a pain-free mouth.

What Are the Key Cost Factors for Partial Dentures

Understanding the cost of partial dentures can be a daunting task. However, knowing the key factors that influence the price can help you make an informed decision about your dental care. In this article, we’ll break down these factors, so you can better understand what affects partial dentures cost and why prices may vary.

The Material Used in Partial Dentures

The type of material used for your partial dentures plays a significant role in determining the overall cost. Common materials for partial dentures include acrylic, metal, and flexible resins. Each material has its benefits and affects both the price and the durability of the dentures.

  • Acrylic Partial Dentures: These are typically the most affordable option. Acrylic dentures are lightweight and comfortable, making them an ideal choice for many patients. However, they may not last as long as other materials, which can make them less cost-effective in the long run.
  • Metal Partial Dentures: These are often stronger and more durable than acrylic dentures. They are ideal for individuals who require dentures that will withstand heavy use. Due to the strength and materials used, metal partial dentures are more expensive than acrylic options.
  • Flexible Partial Dentures: These are made from a unique resin that allows for flexibility and comfort. They are often more expensive than acrylic dentures but provide a more natural look and feel, which may justify the higher cost for some patients.

Choosing the right material for your dentures will impact the overall partial dentures cost. Depending on your preference for durability, appearance, and comfort, your costs will vary.

The Complexity of Your Dental Needs

Your specific dental condition also affects the price of partial dentures. The more complex your dental needs, the higher the cost may be. For example, if you require extensive adjustments or have multiple missing teeth, the cost of your dentures may increase.

  • Customization: Custom dentures are often more expensive than standard ones. A custom-made denture is designed to fit your mouth precisely, ensuring comfort and optimal functionality. This process requires a dentist’s expertise, increasing the overall cost.
  • Fitting Adjustments: If your partial dentures require frequent adjustments or repairs, this can add to the total cost. Some people may need follow-up appointments for fittings and adjustments, which can increase the price of their partial dentures.
  • Surgical Intervention: If your dental treatment involves surgery, such as tooth extractions or jaw alignment, this will further add to the cost of your partial dentures.

Overall, the more specialized the dental care you need, the higher your total cost will be. This is an important factor to consider when looking into partial dentures.

Brand and Expertise: How Revived Smiles Compares

When it comes to partial dentures, the provider you choose can significantly influence the cost. Established providers like Revived Smiles offer quality dentures, and their pricing is designed to be transparent and competitive. Their reputation and expertise ensure that you receive high-quality care and effective dentures, which can sometimes mean a slightly higher price. However, opting for a trusted provider may save you money in the long run by avoiding issues such as poor fit or uncomfortable dentures.

They offer a variety of partial dentures to suit different budgets. While their prices might be slightly higher than some competitors, they pride themselves on providing exceptional customer service and long-lasting results. The cost includes not only the product but also the care and attention to detail that comes with it. The right dentures, tailored to your mouth, will function better and last longer, meaning fewer adjustments and repairs.

Additional Costs and Considerations

While the base price of partial dentures is an essential factor, there are also other costs to consider:

  • Consultation Fees: Most dental providers charge a consultation fee before beginning the fitting process for partial dentures. This can vary depending on the provider and the complexity of your needs.
  • Maintenance and Repairs: Over time, your partial dentures may need to be repaired or adjusted. While some dental plans cover these costs, others may require out-of-pocket expenses. It’s essential to account for this when considering the overall cost of partial dentures.
  • Insurance Coverage: Many insurance policies cover part of the cost of partial dentures, but coverage varies by plan. Before committing to any dental work, it’s crucial to check with your insurance provider to see how much coverage you have for dentures.

By understanding these additional costs, you can plan for your partial dentures cost more effectively and avoid unexpected expenses.

Conclusion

The price of partial dentures can vary significantly depending on the materials used, the complexity of your dental needs, and the provider you choose. Revived Smiles offers a variety of affordable options for partial dentures while providing high-quality service and durability. When determining your partial dentures cost, consider all these factors to ensure that you are choosing the right option for your needs and budget.

Investing in quality partial dentures is a long-term solution to missing teeth, and with the right provider, you can find a balance between affordability and comfort. Whether you’re looking for the most cost-effective option or a more durable solution, understanding what drives the cost will help you make a better decision.

How Soon Can I Eat Ice Cream After Wisdom Tooth Extraction

After undergoing wisdom tooth extraction, the journey to recovery begins. During this time, patients often wonder about what foods they can safely consume to make the process easier and more comfortable. A common treat that many crave is ice cream. The cool, soothing nature of ice cream makes it seem like an ideal comfort food after dental surgery. However, there’s a question many have: How soon can I eat ice cream after wisdom tooth extraction?

In this guide, we will walk you through the necessary precautions, when it is safe to eat ice cream, and provide tips for managing your post-surgery diet. It’s important to understand the healing process and the potential effects certain foods may have on it. So, let’s dive deeper into everything you need to know about eating ice cream and other foods after wisdom tooth extraction.

Understanding the Healing Process After Wisdom Tooth Removal

The first step to understanding when it’s safe to eat ice cream post-surgery is to know the recovery timeline after wisdom tooth extraction. After the procedure, your body is going through a natural healing process, and it’s crucial not to rush this phase.

The First 24 Hours

The first 24 hours after your extraction are critical. During this time, there is bleeding and the formation of a blood clot in the socket where the tooth was removed. Disrupting this clot can result in complications such as dry socket, a painful condition that can significantly delay your recovery.

48 to 72 Hours Post-Surgery

After the initial 24 hours, swelling and discomfort may persist, but the clot has usually begun to stabilize. This is the time when many patients start considering soft foods, such as ice cream, but there are still risks to consider.

Beyond 72 Hours

By this time, most of the swelling and pain should start to subside. You are generally safer to introduce more food options, including ice cream. However, you still need to exercise caution with the temperature and consistency of the ice cream you consume.

When Can You Safely Eat Ice Cream After Wisdom Tooth Extraction?

First 24-48 Hours: No Ice Cream Yet

Why Ice Cream is Not Recommended Initially

While the coolness of ice cream might seem comforting, it’s important to avoid eating it during the first 24 to 48 hours after surgery. Immediately after your wisdom teeth are removed, the area is highly sensitive and healing, and anything too cold or too hot could irritate the sensitive gums and the wound. Moreover, there’s a risk of dislodging the blood clot if you consume anything that requires sucking or excessive swallowing.

Primary Focus During the First Two Days

The primary goal during the first 24-48 hours is to control bleeding and to allow the blood clot to form properly. To prevent complications, your diet should focus on clear liquids like water and broths, and soft foods like yogurt. Even ice cream during this period may risk irritation, as the cold can cause discomfort and potential swelling.

The Safe Time to Eat Ice Cream: After 48 Hours

Reducing Swelling and Soothing the Pain

After 48 hours, you can begin introducing cold foods, and ice cream can be a soothing treat. The coldness of the ice cream may help reduce swelling and numb any lingering discomfort in the extraction site.

Best Practices for Eating Ice Cream

Even after the initial 48 hours, you need to make sure the ice cream you eat is plain and soft. Avoid any varieties that contain crunchy chunks, nuts, or chocolate chips, as they may get stuck in the wound and cause pain. Stick to smooth flavors like vanilla or chocolate and avoid anything with hard pieces or added toppings.

Eating in Moderation

While it’s tempting to indulge in ice cream, moderation is key. Eating too much ice cream too soon can lead to sensitivity, especially if the ice cream is too cold or if you eat it too quickly. Aim for small amounts to start, and make sure that your consumption doesn’t cause any discomfort.

What Are the Risks of Eating Ice Cream Too Soon?

Dry Socket

Dry socket is one of the most common complications that can arise from wisdom tooth extraction. It occurs when the blood clot that forms after the extraction is dislodged or dissolves prematurely. This leaves the bone and nerves exposed, which can cause severe pain and delay the healing process. Eating ice cream too soon, especially if it’s too cold or you eat it too aggressively, can increase the chances of developing dry socket.

Irritation and Sensitivity

After the first few days, the wound is still healing. Extremely cold or hot foods can irritate the sensitive area, causing prolonged discomfort or even bleeding. Ice cream that is too cold can also cause a sensitivity flare-up, resulting in more pain during the recovery process.

What to Eat After Wisdom Tooth Extraction?

Soft Foods to Consider

Eating the right foods during the recovery period is vital for both comfort and healing. Here are some soft foods that are generally safe to consume:

  • Yogurt and Smoothies
    These soft, cool options can be soothing while providing necessary nutrients. Smoothies are great because you can blend in various fruits, protein, and even greens for a balanced diet.

  • Pudding and Custards
    Like ice cream, these are soft, cool foods that won’t irritate the extraction site. Custards and puddings also offer a variety of flavors for you to enjoy while maintaining comfort.

  • Mashed Potatoes and Soups
    Mashed potatoes and soups are excellent during the first few days as they are soft and easy to eat. Opt for mild, non-spicy soups to avoid irritating the wound.

  • Oatmeal and Cream of Wheat
    These are other soft, warm foods that are easy on the gums, though you should avoid anything too hot during the early days of recovery.

Foods to Avoid

  • Crunchy or Hard Foods
    Avoid crunchy foods like chips, popcorn, and nuts, as they can cause pain or disrupt the healing process. Hard fruits and vegetables, like raw carrots, should also be avoided.

  • Spicy or Acidic Foods
    Spicy foods, citrus, and tomatoes can irritate the extraction site. It’s important to stick to bland, non-acidic foods to avoid inflammation or discomfort.

  • Alcohol
    While not a food, alcohol can interfere with your healing process. It can interact with pain medications, increase swelling, and potentially slow down the recovery period.

FAQ’s

1. Can I eat ice cream immediately after wisdom tooth removal?
No, it’s important to wait at least 48 hours before eating ice cream. The blood clot needs time to form, and premature consumption of cold foods may disrupt this process.

2. What type of ice cream is safe after wisdom tooth extraction?
Plain, smooth ice cream without any chunks or hard additions is the best choice. Avoid varieties with nuts, cookies, or chocolate chips that could irritate the wound.

3. How long should I wait before eating solid foods after wisdom tooth extraction?
You should wait 5-7 days before reintroducing solid foods. Stick to soft and easy-to-eat options during the first few days for optimal healing.

4. Is it okay to drink cold beverages after wisdom tooth extraction?
Yes, cold beverages can soothe the area, but avoid using a straw. The suction from drinking through a straw can dislodge the blood clot and cause complications.

5. How can I reduce swelling and pain after wisdom tooth removal?
Apply an ice pack to the face during the first 48 hours and follow your dentist’s prescribed pain management plan to help reduce swelling and discomfort.

6. Are there any foods I should completely avoid after wisdom tooth removal?
Avoid foods that are hard, crunchy, spicy, or acidic. These can irritate the wound or cause pain during healing. Stick to soft and bland options instead.

Conclusion

Eating ice cream after wisdom tooth extraction can be a soothing treat, but timing is crucial. The first 24-48 hours are critical for healing, and you should avoid anything too cold or hard that may disrupt the blood clot or irritate the site. After this period, ice cream can be a wonderful way to reduce swelling and discomfort, but it should be consumed carefully. Always choose smooth varieties, eat in moderation, and avoid overly cold or hard pieces. By following these guidelines, you can ensure that your recovery is smooth and complication-free.

What Does a Cut on Your Gums Look Like?

A cut on your gums may seem minor at first, but it can be a source of discomfort and concern if not treated properly. The gums are an essential part of your oral health, helping to protect the underlying teeth and tissues. While a small gum cut is typically not a cause for alarm, understanding what it looks like and how to handle it can prevent complications. Whether caused by an accidental injury, poor dental hygiene, or dental procedures, a gum cut can result in pain, swelling, and bleeding.

In this article, we will explore what a gum cut looks like, its potential causes, how to treat it, and when it is necessary to seek professional care. By understanding the signs and symptoms, you can better manage a gum cut and ensure proper healing. This guide will also answer some common questions about gum cuts to help you navigate this issue with confidence.

What Causes Cuts on Your Gums?

Gum cuts can occur for a variety of reasons. Understanding the underlying causes is crucial for prevention and quick treatment.

Accidental Trauma:

One of the most common reasons for gum cuts is accidental trauma. Biting into hard foods or brushing too aggressively can cause the gums to tear. Sports injuries or accidents can also lead to cuts and abrasions in the mouth.

Dental Procedures:

Dental cleanings, extractions, or other surgical procedures may inadvertently cause cuts or irritations on the gums. Although dental professionals take great care, the use of sharp instruments or the pressure applied during treatments can sometimes lead to minor gum injuries.

Poor Oral Hygiene:

If plaque and tartar build up on the gums, they can cause irritation, leading to cuts. Poor oral hygiene can also increase the risk of gum diseases, such as gingivitis, which can make the gums more prone to injury.

Infections and Diseases:

Gum diseases like gingivitis and periodontitis can cause inflammation, making the gums more vulnerable to cuts and wounds. These infections weaken the gum tissue, leaving it fragile and easy to tear.

Foreign Objects:

Sometimes, small objects or foods that get stuck in the gums can cause them to tear. For example, splinters from food or sharp objects can result in cuts that may bleed and cause discomfort.

How to Identify a Cut on Your Gums?

Recognizing a gum cut early can help you take appropriate action to avoid complications. Here’s how to identify a cut on your gums:

Visual Appearance:

  • A visible tear or break in the gum tissue, which may appear as a small or large wound.
  • The cut may be shallow or deep, depending on the cause and severity of the injury.
  • Swelling and redness are common around the cut, especially if the injury is fresh.

Pain and Sensitivity:

  • A cut on your gums may cause mild to severe pain, particularly when chewing or brushing.
  • You may also notice increased sensitivity to hot, cold, or acidic foods, which can aggravate the pain.

Bleeding:

  • Gum cuts often bleed when irritated by food, brushing, or general activity.
  • Minor bleeding may stop after a few minutes, but if it persists, it could be a sign of a deeper or infected wound.

Bad Breath or Foul Odor:

    • If the cut becomes infected, it may produce a foul smell, signaling the need for prompt attention.

Treatment Options for Gum Cuts

If you experience a gum cut, prompt and appropriate treatment can help prevent further complications, such as infection. Here’s a detailed guide on how to treat a gum cut at home and when to seek professional help:

At-Home Care:

  • Salt Water Rinse: Rinsing your mouth with warm salt water can help cleanse the area, reduce swelling, and promote healing. Mix a teaspoon of salt in a glass of warm water and rinse several times a day.
  • Cold Compress: Applying a cold compress on the outside of your mouth can help reduce swelling and numb the area to alleviate pain. Hold it against the affected area for 10-15 minutes at a time.
  • Avoid Irritating Foods: Spicy, hot, or acidic foods can aggravate the cut and cause additional pain. Stick to soft, bland foods while the wound heals.
  • Maintain Good Oral Hygiene: Continue brushing your teeth gently, but avoid brushing the affected area directly. Use a soft-bristled toothbrush to avoid further irritation.

Over-the-Counter Medications:

Nonsteroidal anti-inflammatory drugs (NSAIDs), such as ibuprofen, can help manage pain and reduce swelling. Always follow the dosage instructions on the package.

  • An antiseptic mouthwash can also help reduce the risk of infection and promote healing.

When to See a Dentist:

  • Deep Cuts or Lacerations: If the cut is deep, it may require stitches or other professional treatment to heal properly.
  • Persistent Bleeding: If the bleeding lasts longer than 15 minutes or is difficult to stop, seek immediate dental or medical attention.
  • Infected Wounds: If the cut becomes swollen, warm to the touch, or shows signs of pus, it may be infected, and you should visit a dentist as soon as possible.

When to See a Dentist for a Gum Cut?

While many gum cuts heal naturally with home treatment, there are situations where it is important to consult a dentist:

  • Signs of Infection: If you notice signs of infection, such as pus, a foul smell, or increased pain around the affected area, it’s crucial to see a dentist. Infections can spread if not treated promptly, leading to more severe complications like abscesses or tooth loss.

  • Excessive Bleeding: If the cut continues to bleed for an extended period, it may indicate a more serious injury that requires professional care.

  • Severe or Chronic Pain: A gum cut that causes severe or long-lasting pain, despite home remedies, should be evaluated by a dentist. Pain can be a sign of an underlying issue, such as an infected or impacted tooth.

  • Difficulty Eating or Speaking: If the gum cut makes it difficult to eat, drink, or speak, it may be necessary to see a dentist for further evaluation and treatment.

Preventing Cuts on Your Gums

Preventing gum cuts is the best way to avoid the pain and inconvenience associated with them. Here are some tips to keep your gums healthy and minimize the risk of injury:

  • Use a Soft Toothbrush: A soft-bristled toothbrush is gentle on the gums and reduces the chances of cuts or abrasions. Avoid using hard-bristled brushes, as they can irritate the gums.

  • Brush Gently: Brushing your teeth too aggressively can cause your gums to bleed or cut. Use gentle strokes and avoid brushing too hard on the gumline.

  • Avoid Hard or Sharp Foods: Foods with sharp edges, such as chips, nuts, or hard candy, can cut your gums. If possible, avoid eating these foods, or be cautious while chewing them.

  • Wear a Mouthguard: If you play contact sports, wear a mouthguard to protect your gums, teeth, and other oral tissues from injury.

  • Regular Dental Checkups: Visit your dentist regularly for checkups and cleanings. Regular professional care can help detect issues early and keep your gums healthy.

FAQs

Can a gum cut heal on its own?
Yes, minor gum cuts typically heal on their own within a few days. However, deeper or infected cuts may require professional treatment.

How long does it take for a gum cut to heal?
Minor gum cuts usually heal in 3 to 5 days, but deeper cuts may take longer, especially if they become infected.

Should I avoid brushing my teeth if I have a cut on my gums?
It’s important to continue brushing your teeth gently, but avoid brushing directly on the affected area. Use a soft-bristled toothbrush and be gentle around the cut.

What can I do if my gum cut keeps bleeding?
If the bleeding persists for more than 10-15 minutes, apply gentle pressure with a clean cloth and visit a dentist for further evaluation.

Can a cut on my gums be a sign of a bigger issue?
A gum cut can sometimes indicate underlying issues like gum disease. If the cut is recurrent or doesn’t heal, it’s essential to see a dentist for evaluation.

How can I prevent gum cuts in the future?
To prevent gum cuts, brush gently with a soft toothbrush, avoid hard or sharp foods, maintain good oral hygiene, and wear a mouthguard during sports activities.

Conclusion:

A gum cut, while common, should not be ignored. Though minor cuts may heal naturally, it is important to take the necessary steps to treat and care for them to avoid complications. Whether caused by accidental trauma, poor oral hygiene, or infections, being proactive in your oral health care is essential. Understanding what a gum cut looks like, recognizing the symptoms, and knowing when to seek professional help can save you from further discomfort or damage.

By following preventive measures, such as maintaining good oral hygiene and wearing a mouthguard during sports, you can significantly reduce the risk of gum cuts. If you experience any symptoms of infection, persistent bleeding, or severe pain, always consult a dentist for proper care.

Why Do I Keep Biting My Cheek After Wisdom Tooth Extraction

After wisdom tooth extraction, patients often face a variety of complications as they recover. One of the more frustrating issues that many people experience is inadvertently biting the inside of their cheeks. While this may seem like a minor problem, it can cause discomfort, slow down healing, and even lead to further oral issues if left unchecked.

If you’re wondering why you keep biting your cheek after a wisdom tooth extraction and how to stop this from happening, you’re not alone. The healing process following such a procedure involves a delicate balance of tissue regeneration, jaw alignment, and careful aftercare. This article explores the common causes of cheek biting post-extraction, offers practical advice on preventing it, and discusses when it’s time to seek further medical help.

By understanding the underlying factors that contribute to cheek biting after wisdom tooth extraction, you can take steps to minimize discomfort and promote a quicker recovery. So, let’s dive in and explore the topic in detail.

What Happens During Wisdom Tooth Extraction That Could Lead to Cheek Biting?

The wisdom tooth extraction process is usually carried out under local anesthesia, sedation, or general anesthesia, depending on the complexity of the case. The removal of the wisdom teeth, particularly the lower ones, may lead to temporary discomfort or alterations in the way your teeth align, which can make cheek biting more likely.

Key Details of the Procedure:

The extraction involves the surgical removal of one or more wisdom teeth, typically located at the back of the mouth. During the procedure, the gums are cut, and the bone around the tooth may be removed to facilitate extraction. As a result, the surrounding tissues in the mouth—including the inside of the cheek—can become inflamed or irritated.

Effect on Your Bite:

After the extraction, the mouth and jaw may take time to adjust to the new state. Swelling and inflammation can alter how your teeth meet, shifting your bite temporarily. This change can make it easier for your teeth to accidentally contact the inside of your cheek when chewing, especially if you aren’t fully aware of the changes caused by the procedure.

Temporary Misalignment:

The anesthesia used during the procedure can also impact your ability to control your jaw movements immediately after the surgery. This numbness can last for several hours, increasing the risk of accidental cheek biting until the numbness wears off. Additionally, some individuals may experience a slight misalignment in their bite during the initial healing phase due to swelling and the soft tissue recovery process.

Common Causes of Biting Your Cheek After Wisdom Tooth Extraction

Cheek biting after wisdom tooth extraction is common and generally temporary. However, it’s important to understand the key factors contributing to this problem so you can minimize its impact.

Swelling and Pain Altering the Bite:

One of the primary reasons for cheek biting is the swelling that occurs after wisdom tooth extraction. Swelling can cause changes in how your teeth meet. When the swelling is significant, your teeth may not align as they usually would, which increases the likelihood of accidentally biting the inner cheek. In some cases, the swelling can last for several days to weeks, depending on how your body responds to the surgery.

The Effect of Inflammation on Surrounding Tissues:

Inflammation in the gums, cheeks, or jaw can make the soft tissues in your mouth more sensitive. This sensitivity makes it easier to bite your cheek unintentionally. Inflammation can also make the cheeks feel puffy and swollen, which may cause them to protrude slightly into the path of your bite.

Misalignment of Teeth Post-Extraction:

After the removal of wisdom teeth, there can be slight shifts in the alignment of your teeth as they heal. These shifts are often temporary and will stabilize once the swelling goes down and the tissues heal. However, during this transitional period, your teeth may not meet in the same way they did before, making it easier to accidentally bite your cheek, especially when chewing or talking.

How to Prevent Biting Your Cheek After Wisdom Tooth Extraction

While cheek biting is a common occurrence after wisdom tooth extraction, there are several measures you can take to prevent it and make your recovery smoother.

Effective Prevention Methods:

  1. Bite Guards: Using a soft bite guard or mouthguard can protect the inside of your cheeks from accidental biting. These devices can act as a cushion between your teeth and cheeks, reducing the impact of any accidental bites. Your dentist may be able to provide a custom-fit guard.

  2. Dietary Changes: A softer diet is highly recommended during the healing period. Foods like mashed potatoes, soup, and smoothies are ideal because they don’t require much chewing. Avoiding hard, crunchy, or sticky foods will reduce the risk of damaging the soft tissues inside your mouth.

  3. Gentle Chewing: Be mindful of how you chew. Avoid chewing on the side where your wisdom teeth were extracted, as this can aggravate swelling and increase the likelihood of biting your cheek.

  4. Oral Hygiene: Keeping the inside of your mouth clean is crucial, especially in the areas around the extraction sites. Be gentle while brushing to avoid irritating the tender tissues inside your mouth. Using an antiseptic mouthwash can also help reduce inflammation and promote healing.

  5. Ice Packs: Applying ice packs to the outside of your face can help reduce swelling. This will help your bite return to its normal alignment more quickly and prevent the inside of your cheek from coming into contact with your teeth.

When Should You Contact Your Dentist About Cheek Biting?

While cheek biting can be a normal part of the healing process, it’s important to know when it’s time to contact your dentist for help. In some cases, persistent cheek biting could indicate a more serious issue with your recovery, such as an infection or severe misalignment.

Signs to Watch For:

  • Pain that doesn’t subside: If you experience ongoing or increasing pain in the area of your cheek bite, it may indicate that something is wrong. This could be a sign of infection or other complications.

  • Open Sores: If the inside of your cheek develops sores or ulcers from repeated biting, it’s essential to consult your dentist. Sores that don’t heal or become infected can slow down your recovery and may require additional treatment.

  • Difficulty in Bite Alignment: If your bite feels misaligned and doesn’t improve after a few days, it might be worth checking with your dentist to rule out complications.

  • Excessive Swelling: If swelling doesn’t go down after a week or worsens, it could be a sign of an infection or other issue that needs immediate attention.

By staying in contact with your dentist during your recovery, you can ensure that any problems, including cheek biting, are addressed before they become more serious.

FAQs

Q1: Is it normal to bite my cheek after wisdom tooth extraction?

Yes, it’s quite common to accidentally bite your cheek after wisdom tooth extraction due to swelling, misalignment, or the effects of anesthesia. This is usually temporary and improves as you heal.

Q2: How long does cheek biting last after wisdom tooth extraction?

The duration of cheek biting varies from person to person, but it typically lasts for a few days to a week after the extraction. Once the swelling subsides, the problem should go away.

Q3: Can I prevent cheek biting after wisdom tooth extraction?

Yes, there are several ways to prevent cheek biting, such as using a bite guard, sticking to soft foods, and maintaining good oral hygiene during your recovery period.

Q4: What should I do if I keep biting my cheek after wisdom tooth extraction?

If the cheek biting continues or becomes painful, it’s best to contact your dentist. They may recommend a custom mouthguard or check for issues with your healing process.

Q5: How can I speed up the healing process to avoid cheek biting?

To speed up the healing process, be sure to follow all aftercare instructions provided by your dentist. Use ice packs, eat soft foods, and avoid chewing on the side where the extraction took place. Keeping your mouth clean is also crucial for reducing inflammation.

Conclusion

Cheek biting after wisdom tooth extraction is a common issue that many patients face during the recovery process. While it can be frustrating and uncomfortable, it is usually temporary and can be managed with the right strategies. By understanding the causes behind this problem and taking proactive steps to protect your cheeks during healing, you can reduce the chances of ongoing discomfort and speed up the recovery process.

If cheek biting persists or leads to significant issues, don’t hesitate to consult your dentist to ensure there are no underlying complications. With proper care, your mouth will heal, and the problem will resolve itself over time.

How Long Does It Take for Invisalign to Start Working?

Invisalign has become a popular option for people seeking to straighten their teeth without the discomfort and visibility of traditional braces. The clear aligners are custom-designed to fit your teeth, gradually shifting them into place over time. One of the most common questions from patients is: “How long does it take for Invisalign to start working?”

Understanding the Invisalign timeline is essential for managing expectations and tracking progress throughout the treatment. The timeline for seeing results can vary depending on factors such as the complexity of your case, your commitment to wearing the aligners, and the expertise of your orthodontist. In this comprehensive guide, we will explore the factors that influence how quickly Invisalign begins working and provide a detailed breakdown of what you can expect throughout the process.

How Long Does It Take for Invisalign to Start Working?

Invisalign treatment is not a one-size-fits-all solution, and the time it takes for Invisalign to start working depends on several key factors. For most patients, subtle changes can be seen within the first 4 to 6 weeks of treatment. However, significant changes that show noticeable improvements may take a few months, depending on the severity of the case.

The treatment timeline is broken down into several stages, with each stage offering different milestones and results. While many people experience gradual progress, others may see faster results depending on how their teeth respond to the aligners. The most important thing to remember is that Invisalign works progressively, and results take time.

Factors That Influence How Long Invisalign Takes to Show Results

There are several factors that will affect how quickly Invisalign starts working and how long the entire treatment takes. These factors include:

Severity of Misalignment

The more severe the misalignment, the longer it may take for Invisalign to make noticeable progress. Minor misalignments can usually be corrected more quickly, while complex cases, such as severe overbites or underbites, may take longer to correct.

Patient Compliance

One of the most significant factors in determining how quickly Invisalign works is how consistently you wear the aligners. The aligners need to be worn for 20 to 22 hours per day to ensure that the treatment proceeds as planned. Skipping days or wearing the aligners less than recommended can delay your results.

Age

Younger patients typically experience faster tooth movement compared to adults. As we age, our teeth become more resistant to movement, which can extend the length of treatment. Children and teenagers may see faster progress than adults, but adults can still achieve great results with Invisalign.

Type of Invisalign Treatment

Invisalign offers different treatment options depending on your needs, including Invisalign Express for minor adjustments and Invisalign Full for more complex cases. The type of treatment you require will also impact how quickly the aligners begin to show results.

Professional Expertise

The skill and experience of the orthodontist or dentist managing your treatment can also play a role in how quickly Invisalign works. An experienced provider will have a deeper understanding of the Invisalign system and how to use it to achieve the best results in the shortest amount of time.

Invisalign Treatment Timeline: What to Expect

Although the length of treatment varies from person to person, the typical Invisalign journey follows a general timeline:

Step 1: Initial Consultation (1-2 Weeks)

The first step in your Invisalign journey is to schedule an initial consultation with an orthodontist or dentist. During this visit, the provider will assess the alignment of your teeth and discuss your treatment goals. They will also take X-rays, scans, and impressions of your teeth to create a personalized treatment plan. This step typically takes 1-2 weeks.

Step 2: Receiving Your Aligners (2-4 Weeks)

Once your treatment plan is created, it takes approximately 2 to 4 weeks for your aligners to be custom-made. After your aligners are ready, you will return to the office to receive them. Your orthodontist will walk you through how to wear them and what to expect during the first few weeks of treatment.

Step 3: Wearing the Aligners and Seeing Early Results (4-6 Weeks)

After wearing your first set of aligners for 1 to 2 weeks, you may begin to notice subtle changes in the position of your teeth. Many patients start to feel some discomfort as their teeth shift, which is perfectly normal. This is a sign that the aligners are doing their job. You may notice that your teeth start to feel a bit looser as they gradually begin to move into the desired positions. This is usually when patients begin to see the first signs of progress, which typically happens around the 4-6 week mark.

Step 4: Ongoing Treatment and Adjustments (2-3 Months)

Over the next few months, you will continue wearing each set of aligners for about 1 to 2 weeks before switching to the next set. At each stage, your teeth will shift closer to their final positions. You will visit your orthodontist every 6 to 8 weeks for check-ups, adjustments, and to pick up your next set of aligners. These check-ups are essential for ensuring that the treatment is progressing as planned.

Step 5: Achieving Final Results (12-18 Months)

Most Invisalign treatments last between 12 to 18 months. The exact length of your treatment will depend on the severity of your dental issues and how well you follow the prescribed plan. After your teeth have moved into their desired positions, you may need to wear retainers to maintain your results. Retainers help prevent your teeth from shifting back to their original positions.

Common Invisalign Treatment Challenges

While Invisalign is an effective and discreet way to straighten your teeth, it does come with its challenges. Here are some common issues that patients face during their treatment:

Discomfort

Many patients report feeling mild discomfort when they first start wearing a new set of aligners. This discomfort is temporary and should subside within a few days as your teeth adjust.

Speech Impediment

It’s normal to experience a slight lisp when you first begin wearing your aligners. However, this typically improves as you get used to wearing them.

Relapse of Teeth Position

After the treatment is completed, it is essential to wear a retainer as prescribed to maintain the new position of your teeth. Failing to do so could result in your teeth shifting back to their original positions.

How to Speed Up Your Invisalign Treatment

While Invisalign is already a fast and effective way to straighten your teeth, there are a few things you can do to accelerate the process:

Wear Your Aligners Consistently

One of the most important things you can do is to wear your aligners for the recommended 20-22 hours per day. The more you wear them, the faster your teeth will move.

Consider AcceleDent

AcceleDent is a device that uses gentle vibrations to accelerate tooth movement. This can help speed up the treatment process by stimulating the bone around your teeth.

Regular Checkups

Regular visits to your orthodontist or dentist will ensure that your treatment is progressing as expected. These checkups allow the provider to make any necessary adjustments and ensure that your aligners fit properly.

Use Rubber Bands if Needed

In some cases, your orthodontist may recommend using rubber bands along with your aligners to improve the alignment of your bite. Using rubber bands as directed can help speed up treatment.

Frequently Asked Questions (FAQs)

How long does it take to see noticeable results with Invisalign?
You can expect to see subtle changes in your teeth after about 4 to 6 weeks of wearing the aligners.

How long does Invisalign treatment typically last?
Most Invisalign treatments take between 12 to 18 months, depending on the severity of the case.

Can Invisalign work faster than traditional braces?
Invisalign can be faster for cases of mild to moderate misalignment, but more complex issues may require longer treatment times with Invisalign.

What should I do if my aligners cause discomfort?
Mild discomfort is normal, but if it persists, consult your orthodontist. They may adjust the aligners for better fit or comfort.

Is it necessary to wear a retainer after finishing Invisalign?
Yes, wearing a retainer is essential to prevent your teeth from shifting back to their original positions.

Can I eat or drink with Invisalign in?
You should remove the aligners before eating or drinking anything other than water. This prevents staining and damage to the aligners.

Conclusion

Invisalign is a proven and effective method for straightening teeth, with many patients experiencing visible results within the first few weeks. While the full treatment typically takes between 12 to 18 months, many people begin seeing noticeable changes in just a few months. It’s important to understand that the process is gradual and requires patience and commitment.

By following your orthodontist’s instructions, wearing your aligners as directed, and attending regular checkups, you can achieve the smile you’ve always wanted with Invisalign.

What Happens During Teeth Cleaning?

Teeth cleaning is one of the most fundamental parts of oral health. Though it’s common practice to visit the dentist every six months for this procedure, many people don’t fully understand the intricate steps involved. So, what happens during teeth cleaning?

Teeth cleaning involves more than just a simple scrub of your teeth. It’s a multi-step process designed to ensure that your teeth and gums remain healthy, your smile is bright, and you avoid future dental problems. Whether it’s your first visit to the dentist for a professional cleaning or you’re preparing for a routine checkup, understanding what happens during teeth cleaning can help alleviate any concerns and ensure you feel confident and prepared.

In this article, we will walk through the entire process of teeth cleaning, explaining each step in detail, why it’s necessary, and how it helps maintain your overall oral health. Additionally, we will discuss the benefits of regular cleanings, answer some frequently asked questions, and give tips on how to maintain your oral hygiene at home.

What Happens During Teeth Cleaning? A Step-by-Step Process

Initial Consultation and Examination

Before the actual cleaning begins, your dental professional will conduct an initial examination to assess your oral health. The goal is to check for any underlying issues that might affect the teeth cleaning process or indicate a more serious condition. The dentist or dental hygienist will look for signs of:

  • Cavities

  • Gum disease (gingivitis or periodontitis)

  • Loose teeth

  • Oral infections

  • Abnormalities such as oral cancer

During this exam, the dental hygienist will typically take X-rays of your teeth if needed. The dentist will then review these images to check for problems that aren’t visible to the naked eye. They’ll also update your medical history and ask about any medications you’re taking, as some conditions, such as diabetes or heart disease, can affect your oral health and may require special considerations during the cleaning process.

Importance of the Initial Examination:

  • Identifies potential dental issues early on.

  • Helps create a personalized treatment plan if needed.

  • Ensures safety for individuals with underlying health conditions.

Scaling: Removing Plaque and Tartar

The next and most essential step of the teeth cleaning process is scaling, which involves the removal of plaque and tartar from your teeth and gums. Plaque is a sticky, colorless film of bacteria that constantly forms on your teeth, especially in hard-to-reach areas. If not removed, plaque hardens into tartar, which can only be removed by a dental professional.

Why is Scaling Necessary?

  • Plaque & Tartar Buildup: While brushing and flossing help remove plaque, some areas, such as between the teeth or along the gum line, are hard to reach, making it impossible to eliminate all plaque at home.

  • Prevention of Gum Disease: Plaque and tartar are the leading causes of gum disease. If not removed, they can irritate and inflame the gums, leading to gingivitis, which can progress to periodontitis, a more severe form of gum disease.

How Does Scaling Work?

  • The hygienist will use a tool called an ultrasonic scaler that vibrates to break down plaque and tartar.

  • They may also use hand-held instruments like scalers or curettes for finer scaling, especially around the gum line.

Scaling typically doesn’t cause pain, though some individuals may feel slight discomfort, particularly if they have sensitive gums or a lot of plaque buildup.

Key Points about Scaling:

  • Targets hard-to-reach areas where plaque accumulates.

  • Helps to prevent gum disease and cavities by removing harmful bacteria.

  • Essential for maintaining long-term oral health.

Polishing Your Teeth: For That Smooth Finish

Once the scaling is complete, your teeth are polished. Polishing is done using a special abrasive paste, which is gently buffed onto your teeth with a polishing tool. This step does more than just improve the aesthetic appearance of your teeth – it also serves important functional purposes.

What Does Polishing Do?

  • Surface Stain Removal: It helps eliminate surface stains caused by foods, beverages, or tobacco use.

  • Smooth Surface: Polishing gives your teeth a smooth, shiny surface, making it harder for plaque to accumulate in the future.

  • Freshens Breath: It also leaves your mouth feeling fresh and clean, removing bacteria that can cause bad breath.

Polishing typically involves no discomfort, and many people find the process to be relaxing.

Why Polishing Is Important:

  • Improves your smile’s appearance.

  • Makes it easier to keep teeth clean between dental visits.

  • Reduces the chances of plaque re-accumulating quickly.

Fluoride Treatment for Extra Protection

After your teeth have been scaled and polished, many dental professionals apply fluoride treatment as the final step in the cleaning process. Fluoride is a mineral that strengthens tooth enamel, providing an extra layer of protection against cavities and decay.

Why Fluoride Is Beneficial:

  • Cavity Prevention: Fluoride helps to remineralize weakened tooth enamel, preventing cavities and decay.

  • Reduces Tooth Sensitivity: Fluoride can also reduce tooth sensitivity, which can be a common issue after cleaning.

  • Long-Lasting Protection: The fluoride treatment generally lasts for several months, offering added protection between cleanings.

Fluoride treatments are quick and easy to apply. You may be asked to avoid eating or drinking for a few hours after the treatment to allow it to fully absorb into your teeth.

Post-Cleaning Advice and Follow-Up Care

Once the cleaning process is complete, your dentist will provide advice on how to maintain good oral hygiene at home. They will remind you of the importance of regular brushing and flossing, and may even demonstrate techniques for brushing and flossing effectively.

Post-Cleaning Tips:

  • Brush Twice a Day: Use a fluoride toothpaste and brush your teeth for two minutes, twice a day.

  • Floss Daily: Flossing helps remove food particles and plaque from areas between your teeth that brushing can’t reach.

  • Limit Sugary Foods: Try to reduce your intake of sugary foods and drinks, which can lead to plaque buildup.

  • Regular Checkups: Keep your dental appointments every six months for routine cleanings and exams.

If your dentist noticed any issues during the exam (such as gum disease or cavities), they will discuss the next steps for treatment, which could include further cleanings, fillings, or other procedures.

Why Is Teeth Cleaning Important?

Teeth cleaning isn’t just about maintaining a bright smile. Regular professional cleanings are vital for preventing serious oral health issues that can arise from plaque and tartar buildup. While brushing and flossing daily are essential for oral hygiene, professional cleaning ensures that areas that are hard to reach get the attention they need.

Key Benefits of Regular Teeth Cleaning:

  • Prevents Cavities and Tooth Decay: Plaque and tartar can cause cavities, which, if left untreated, lead to tooth decay and tooth loss.

  • Prevents Gum Disease: Regular cleanings help prevent gum disease, which can cause swollen, bleeding gums and tooth loss.

  • Boosts Overall Health: Oral health is linked to overall health. Poor oral hygiene has been linked to heart disease, diabetes, and other health issues.

FAQ

1: Does Teeth Cleaning Hurt?

Teeth cleaning should not cause pain. However, people with sensitive gums or significant tartar buildup might feel some discomfort. If you’re worried about discomfort, talk to your dentist ahead of time – they may be able to offer numbing gel or other methods to make the process more comfortable.

How Often Should I Get My Teeth Cleaned?

Most people should schedule a professional cleaning every six months. However, if you have certain risk factors, such as a history of gum disease or cavities, your dentist may recommend more frequent cleanings, such as every 3-4 months.

Can Teeth Cleaning Whiten My Teeth?

While teeth cleaning can remove surface stains, it is not designed to whiten teeth. For more significant whitening, you should consider professional teeth whitening treatments.

Is Teeth Cleaning Covered by Insurance?

Teeth cleaning is typically covered by most dental insurance plans as part of your preventive care. However, always check with your insurer for specifics regarding coverage.

Can Teeth Cleaning Prevent Cavities?

Yes, professional teeth cleaning helps prevent cavities by removing plaque and tartar that could lead to tooth decay.

Conclusion

In conclusion, understanding what happens during teeth cleaning can make your visit to the dentist a much more manageable experience. The cleaning process involves scaling to remove plaque and tartar, polishing for a smooth and shiny surface, and fluoride treatment to protect your enamel. Regular cleanings are essential to keeping your teeth and gums healthy and preventing issues like gum disease, cavities, and bad breath. Following your dentist’s advice and maintaining a solid at-home oral hygiene routine will ensure your smile stays bright and healthy for years to come.

Remember, routine cleanings are a key part of a healthy oral care regimen, so don’t skip them. Your teeth will thank you!

How Much to Get a Chipped Tooth Fixed: Everything You Need to Know

A chipped tooth is one of the most common dental issues people face, and while it can happen in an instant—whether from eating something hard, a sports accident, or just a simple fall—what happens afterward is crucial. A chipped tooth may not seem like an urgent issue, but it often requires professional treatment to restore both the tooth’s appearance and function. However, the question that often arises is, “How much to get a chipped tooth fixed?”

The cost of fixing a chipped tooth can vary greatly depending on the severity of the damage, the treatment options available, and where you live. In this article, we’ll explore the different methods of repairing a chipped tooth, along with the costs associated with each. We’ll also look at factors that influence the price, how to find affordable treatment, and the importance of getting prompt attention to avoid further complications.

The Cost of Fixing a Chipped Tooth: What You Need to Know

Understanding the Factors That Influence Cost

The cost of fixing a chipped tooth can be influenced by various factors, and it’s essential to understand these factors before deciding on treatment. Here’s a breakdown of what can affect the cost:

Severity of the Chip:

Minor chips or cosmetic damage typically cost less to fix than a more severe chip that involves the tooth’s inner structures. A small, superficial chip will require a different kind of treatment than a deep crack or one that affects the tooth’s core.

Type of Treatment:

The type of treatment you choose for repairing a chipped tooth will have a direct impact on the cost. The options range from affordable bonding and veneers to more expensive treatments such as crowns and root canals. Some treatments are more durable and long-lasting, which can affect the overall cost in the long run.

Dental Expertise:

The experience and reputation of the dentist can also influence the cost. A more experienced cosmetic dentist might charge more for their services compared to a general dentist, but you may be paying for their expertise and skill.

Location of the Dentist:

Dental fees vary widely depending on location. Urban areas, especially big cities, generally have higher prices compared to rural areas. Factors like rent, cost of living, and the overall demand for dental services in your area can also play a role.

Insurance Coverage:

If you have dental insurance, it may help to offset some of the costs, but it depends on your plan. Cosmetic procedures like veneers may not be covered, while restorative work like bonding and crowns might be partially covered.

Types of Treatments to Fix a Chipped Tooth

When it comes to fixing a chipped tooth, several treatment options are available, each with its own price range. Here’s an overview of the most common treatments:

  1. Tooth Bonding

    • Cost: $100 – $400 per tooth

    • Description: Bonding is one of the most affordable ways to repair a chipped tooth. The dentist uses a tooth-colored resin to fill in the chip and then shapes it to match the natural contours of the tooth. This process typically takes about 30 to 60 minutes per tooth and can be completed in one visit.

    • Pros: Quick, affordable, and non-invasive.

    • Cons: Not as durable as other treatments and may require touch-ups after a few years.

  2. Veneers

    • Cost: $500 – $2,500 per tooth

    • Description: dental veneers are thin shells of porcelain or composite resin placed over the front of the tooth to restore its appearance. They’re an excellent option for cosmetic fixes and can also help with discolored or uneven teeth. The process involves removing a small amount of enamel and bonding the veneer to the tooth.

    • Pros: Long-lasting, highly durable, and highly aesthetic.

    • Cons: More expensive than bonding, and irreversible.

  3. Crowns

    • Cost: $1,000 – $3,000 per crown

    • Description: Dental crowns cover the entire tooth, making them ideal for large chips or teeth that have become structurally compromised. A crown restores both the function and the appearance of a damaged tooth, and they are typically made of porcelain or a metal-ceramic blend.

    • Pros: Strong, durable, and ideal for restoring severely damaged teeth.

    • Cons: Expensive and requires at least two dental visits.

  4. Root Canal Treatment

    • Cost: $700 – $1,500 per tooth

    • Description: If the chip extends deep enough to expose the pulp of the tooth, a root canal may be necessary. During a root canal, the dentist removes the infected pulp, cleans the root canals, and seals the tooth. Afterward, a crown is usually placed to protect the tooth.

    • Pros: Necessary for severe damage that affects the pulp.

    • Cons: Time-consuming and more expensive, as it requires multiple visits.

  5. Dental Implants

    • Cost: $1,500 – $6,000 per implant

    • Description: If the tooth is severely damaged or lost entirely, an implant may be necessary. The process involves placing a titanium post into the jawbone, followed by attaching a crown to the post. Implants are designed to mimic the function and appearance of natural teeth.

    • Pros: Long-lasting and highly functional.

    • Cons: Expensive, involves surgery, and takes several months to complete.

Additional Costs to Consider

In addition to the cost of the treatment itself, there are other factors that may add to your overall bill:

  • X-rays: Before performing any procedure, your dentist may need to take X-rays to assess the extent of the damage. X-rays can cost anywhere from $25 to $250, depending on the complexity and the number of images needed.

  • Anesthesia or Sedation: Depending on the treatment and your comfort level, your dentist may recommend local anesthesia or even sedation to ensure the procedure is pain-free. This can add an extra $100 to $500 to your bill.

  • Follow-up Visits: Some procedures, such as crowns and veneers, may require follow-up visits for adjustments. These follow-up visits can cost anywhere from $50 to $200 each.

How Dental Insurance Affects the Cost of Fixing a Chipped Tooth

Dental insurance can significantly reduce the out-of-pocket cost of fixing a chipped tooth. However, the extent of the coverage depends on your specific insurance plan and the type of procedure required. Here’s how insurance can help:

Coverage for Restorative Procedures

Most dental insurance plans cover at least part of the cost of restorative procedures such as bonding and crowns, especially if the chip has compromised the tooth’s functionality. However, the insurance may only cover a portion of the cost, leaving you to pay for the remainder.

Coverage for Cosmetic Procedures

Unfortunately, most dental insurance plans do not cover cosmetic procedures like veneers unless there is a medical necessity. If you are opting for veneers to fix a chipped tooth, you will likely need to pay out of pocket.

Deductibles and Co-pays

Even if your dental insurance covers a portion of the cost, you will likely need to pay a deductible or a co-payment. It’s essential to review your insurance policy to understand how much you’re responsible for paying.

Can You Avoid Fixing a Chipped Tooth?

While it may be tempting to leave a chipped tooth untreated, doing so can lead to further damage over time. A chipped tooth may look harmless, but even a small crack can expose the inner layers of the tooth, making it more susceptible to decay and infection. Here’s why you should not ignore the issue:

  • Further Damage: The chip may get larger, especially if the tooth is exposed to pressure, like from biting down or grinding your teeth.

  • Increased Risk of Infection: If the chip reaches the pulp of the tooth, bacteria can enter, leading to a painful infection that may require a root canal.

  • Aesthetic Issues: A visible chip can affect your confidence and may impact your smile’s appearance. Treating the chip promptly can help restore both form and function.

When Should You Seek Treatment for a Chipped Tooth?

Not all chipped teeth require immediate treatment, but there are signs that indicate you should seek help from your dentist:

  1. Pain or Sensitivity: If you experience pain or sensitivity when eating or drinking, the chip may have exposed the nerve.

  2. Large or Deep Chip: A large or deep chip may affect the tooth’s structure and require more intensive treatment.

  3. Visible Damage: If the chip is visible and bothers you aesthetically, you may want to address the issue sooner rather than later.

  4. Increased Risk of Infection: If you notice signs of infection, such as swelling, redness, or pus, immediate treatment is necessary.

How to Prevent a Chipped Tooth in the Future

Preventing a chipped tooth is often easier than fixing one. Some practical tips for avoiding chips include:

  • Avoid Biting on Hard Objects: Hard candies, ice, and even fingernails can cause chips, so be cautious when chewing.

  • Wear a Mouthguard: If you play sports or grind your teeth at night, consider wearing a mouthguard to protect your teeth from damage.

  • Practice Good Oral Hygiene: Keeping your teeth healthy and strong through regular brushing and flossing can reduce the risk of chips and cracks.

FAQs

How much does it cost to fix a chipped tooth with bonding?

The cost of bonding typically ranges from $100 to $400 per tooth.

Can a chipped tooth heal on its own?

No, a chipped tooth requires professional treatment to restore its function and appearance.

How long do veneers last on a chipped tooth?

Veneers can last anywhere from 10 to 15 years, depending on how well they’re cared for.

Is a crown necessary for a chipped tooth?

A crown is usually necessary if the chip is large or compromises the tooth’s structure.

Does dental insurance cover chipped tooth repair?

Dental insurance may cover part of the cost for restorative procedures but not for cosmetic treatments like veneers.

Conclusion

The cost of fixing a chipped tooth can range from a few hundred dollars to a few thousand, depending on the type of treatment you choose, the severity of the chip, and whether you have insurance coverage. It’s important to address a chipped tooth as soon as possible to prevent further damage and ensure the best possible outcome. Discuss your options with your dentist to find the most cost-effective and appropriate treatment for your situation.

What is Facial Aesthetics? Exploring Treatments, Benefits, and More

Facial aesthetics is a growing field of non-surgical treatments that aim to enhance and restore the natural beauty of your face. Whether you’re looking to reduce wrinkles, enhance volume, or smoothen your skin, facial aesthetic procedures offer effective and minimally invasive solutions. With procedures like Botox, dermal fillers, and skin rejuvenation treatments, facial aesthetics help people of all ages feel more confident in their appearance. In this article, we will dive deep into what facial aesthetics entails, explore the various treatment options, their benefits, and considerations for choosing the right one.

What is Facial Aesthetics?

Facial aesthetics refers to the art and science of improving the appearance of the face through non-surgical methods. These treatments focus on enhancing the natural features, restoring youthful skin, and addressing common signs of aging, such as fine lines, wrinkles, and loss of facial volume. Unlike traditional surgical procedures, facial aesthetic treatments typically have minimal recovery time and no need for general anesthesia, making them an appealing option for those seeking quick results with less downtime.

Understanding Facial Aesthetics and Its Purpose

Facial aesthetics is primarily concerned with using minimally invasive procedures to rejuvenate and enhance facial features. The goal of these treatments is to create a natural look that enhances a person’s features without the need for major surgery. It’s not just about vanity but also about helping individuals feel better about themselves, restoring confidence, and promoting self-esteem. Here’s a look at the key reasons why people choose facial aesthetic treatments:

  • Youthful appearance: Reduce visible signs of aging, such as wrinkles and sagging skin.

  • Enhance facial features: Highlight certain features like fuller lips or a sharper jawline.

  • Improving skin texture: Address issues such as acne scars or uneven skin tone.

Common Facial Aesthetic Treatments

Facial aesthetic treatments cover a wide array of procedures. Below are the most common and effective options:

1. Botox Injections

Botox is perhaps the most famous facial aesthetic treatment. It works by temporarily relaxing the muscles that cause wrinkles, particularly around the forehead, eyes, and mouth. The treatment is quick, effective, and requires no downtime. Botox can smooth fine lines and wrinkles, resulting in a more youthful and refreshed appearance. Botox typically lasts 3-6 months, after which touch-ups are needed to maintain the results.

  • Benefits: Reduces the appearance of crow’s feet, forehead lines, and frown lines.

  • Considerations: Requires repeat treatments, and the results may vary based on muscle activity.

Dermal Fillers

Dermal fillers are used to restore lost volume in areas like the cheeks, under the eyes, and the lips. Fillers such as hyaluronic acid or calcium hydroxylapatite are injected into the skin to smooth wrinkles and add volume to the face. Unlike Botox, which works by relaxing muscles, dermal fillers add substance to the skin, providing a plumper and more youthful appearance.

  • Benefits: Adds volume to sagging areas, enhances lips, and smooths out deeper wrinkles.

  • Considerations: Results are temporary, and multiple sessions may be required.

Chemical Peels

Chemical peels involve the application of a chemical solution to the skin to remove the outer layers, allowing fresher skin to emerge. This treatment improves skin texture, removes dead skin cells, and is especially effective for treating acne scars, sunspots, and fine lines.

  • Benefits: Smoothens skin, reduces pigmentation, and encourages new skin growth.

  • Considerations: Can cause temporary redness and peeling after the procedure.

Laser Skin Treatments

Laser treatments are used to target deeper layers of skin to stimulate collagen production, reduce wrinkles, and address skin texture issues like acne scars and hyperpigmentation. The procedure works by using light or lasers to promote healing, which leads to smoother and firmer skin over time.

  • Benefits: Promotes collagen production, reduces pigmentation, and tightens the skin.

  • Considerations: Requires multiple treatments for optimal results, with slight downtime.

Benefits of Facial Aesthetic Treatments

There are numerous advantages to opting for facial aesthetic treatments. Here are some of the primary benefits that individuals experience:

1. Non-invasive with Minimal Recovery Time

Facial aesthetic procedures are generally non-surgical, meaning they don’t require major cuts, stitches, or general anesthesia. Because of this, the recovery time is much shorter than with traditional surgery. Most people can resume their normal activities within a day or two.

2. Instant Results

Unlike some cosmetic surgeries, which may take weeks or months to show results, many facial aesthetic treatments provide visible improvements almost immediately. For example, Botox and dermal fillers show instant results, making them ideal for people with busy schedules.

3. Enhance Natural Features

Facial aesthetic treatments focus on enhancing your natural features. For instance, dermal fillers can create fuller lips or a more defined jawline without looking artificial. Botox can smooth wrinkles without making your face look frozen or expressionless.

4. Boosts Self-confidence

Many individuals choose facial aesthetics not only for their physical benefits but also for the emotional and psychological boost they offer. Feeling good about your appearance can increase self-esteem and make you feel more confident in social situations or at work.

5. Customizable to Individual Needs

One of the biggest advantages of facial aesthetics is that the treatments are highly customizable. Whether you want to reduce wrinkles, add volume, or address pigmentation issues, these treatments can be tailored to meet your specific needs and goals.

Who Should Consider Facial Aesthetic Treatments?

Facial aesthetic treatments are suitable for a wide variety of individuals. People from different age groups and with various cosmetic concerns may benefit from these procedures. Here are some groups who commonly choose facial aesthetics:

1. Those Seeking Anti-aging Solutions

Facial aesthetic treatments are particularly popular among individuals looking to fight the signs of aging. Botox is often used by those in their 30s and 40s to prevent the formation of wrinkles, while dermal fillers are ideal for people who want to restore lost volume as they age.

2. People Looking to Enhance Their Features

Facial aesthetics is not only for those looking to reverse aging; it can also help people who wish to enhance their features. Individuals who desire fuller lips, a more defined jawline, or even slightly sharper cheekbones may find dermal fillers and Botox helpful.

3. Those with Skin Imperfections

People struggling with acne scars, pigmentation issues, or uneven skin tones often opt for chemical peels or laser skin treatments. These treatments work by rejuvenating the skin and giving it a smoother, more even appearance.

Is Facial Aesthetic Treatment Right for You?

Before deciding on facial aesthetic treatments, consider the following factors:

1. Consult a Professional

Always start by consulting a licensed, experienced practitioner. A good professional will be able to evaluate your needs and suggest the right treatments that align with your aesthetic goals.

2. Consider Your Medical History

Discuss any pre-existing conditions, allergies, or medications with your practitioner to ensure the safety and effectiveness of the treatment.

3. Realistic Expectations

While facial aesthetics can enhance your appearance, it’s important to have realistic expectations. The results can be subtle and may take time to fully develop, so patience is key.

Frequently Asked Questions (FAQs)

Q1: What is the difference between Botox and dermal fillers?

Botox works by relaxing the muscles that cause wrinkles, while dermal fillers add volume to the face, filling in wrinkles and enhancing features.

Q2: How long do the results of facial aesthetics last?

Botox typically lasts 3-6 months, dermal fillers can last from 6 months to a year, and laser treatments may require multiple sessions for optimal results.

Q3: Is there any downtime after facial aesthetic procedures?

Most procedures have minimal downtime, with some temporary redness, swelling, or bruising that resolves in a few hours to a few days.

Q4: Are facial aesthetic treatments safe?

Yes, when performed by a qualified and experienced professional, facial aesthetic treatments are generally safe with minimal risks.

Q5: How soon will I see results from Botox or dermal fillers?

Botox results are typically visible within 3-5 days, while dermal fillers show immediate results, with some areas improving further over a few days.

Q6: Can facial aesthetics help with acne scars?

Yes, chemical peels and laser skin treatments are highly effective in treating acne scars and improving skin texture.

Conclusion

Facial aesthetics has revolutionized the world of beauty and wellness, offering people non-invasive treatments to rejuvenate their appearance and boost confidence. Whether you choose Botox, dermal fillers, or a laser skin treatment, these procedures provide a more youthful and enhanced look with minimal downtime and natural results. However, it is essential to consult with a qualified professional to ensure that these treatments meet your individual goals and needs. As facial aesthetics continue to grow in popularity, more people are choosing these procedures to help them look and feel their best.

1 4 5 6 7 8 11